
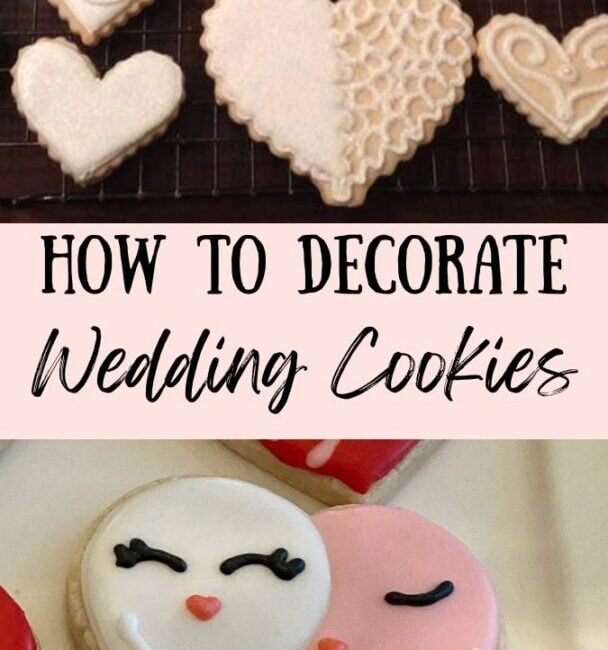
If you're looking for cookie ideas for an upcoming wedding or bridal shower you've come to the right place. These cookie ideas are simple, delicious, and oh, so cute!
Hand-Painted Cookies: A Wedding Favorite!
Hand-painted wedding cookies have become a favorite choice for modern weddings because they offer a personalized and elegant touch that mass-produced treats simply can't match.
Decorated wedding cookies are perfect for wedding dessert tables, bridal showers, and edible wedding favors, making them both beautiful and practical for celebrations.
In this post, I'll showcase my collection of wedding cookie designs along with a brief tutorial on how to recreate each look using detailed photos as your guide.
These artisanal cookies are often used as charming gifts at place settings or displayed on decorative trays, adding both beauty and a delicious surprise to your celebration.
If you're planning a full dessert display, you might also enjoy my guide to creating a beautiful wedding dessert table filled with cookies, cupcakes, and elegant bite-sized treats.
Why Wedding Cookies Are So Popular
Decorated cookies have become one of the most popular treats at modern weddings. Not only are they beautiful, they’re incredibly versatile. Wedding cookies can be displayed on an elegant dessert table, packaged as edible favors for guests, or served at bridal showers and engagement parties.
Many couples love including decorated cookies because they can be customized to match the wedding’s colors, theme, or monogram. From delicate floral designs to classic hearts and elegant lace patterns, decorated cookies add a personal and memorable touch to the celebration.
The best part? With a simple sugar cookie recipe and a good royal icing, you can create bakery-style cookies right at home.
If you’re planning to decorate cookies for a wedding or special event, these helpful recipes and tutorials will give you everything you need to get started.
The Best Cookies for Decorating
If you're planning to decorate cookies for weddings, starting with the right base recipe makes all the difference. A sturdy cookie that holds its shape and a smooth royal icing will give you the best results.
If you need a reliable cookie base or decorating icing, these recipes will help you get started:
• Cut-Out Sugar Cookies – perfect for hearts, monograms, and wedding shapes
• Easy Royal Icing Recipe – the classic icing used for decorating cookies
• Cookie Decorating with Royal Icing – step-by-step decorating basics
With these recipes in place, you'll have everything you need to create beautiful decorated cookies for weddings, bridal showers, or special celebrations.
What are waiting for? Let's dive in!
Sugar Cookie Recipe
If you want the details for this recipe, please visit my Cut-Out Sugar Cookie post. Here's what you'll need to make these cookies.
- 1 cup room temperature salted butter
- 1 cup powdered sugar
- ½ cup granulated sugar
- 1 room temperature egg (extra large)
- 3 cups all-purpose flour
- 1 teaspoon baking powder
- 1 teaspoon vanilla extract
- ½ teaspoon almond extract
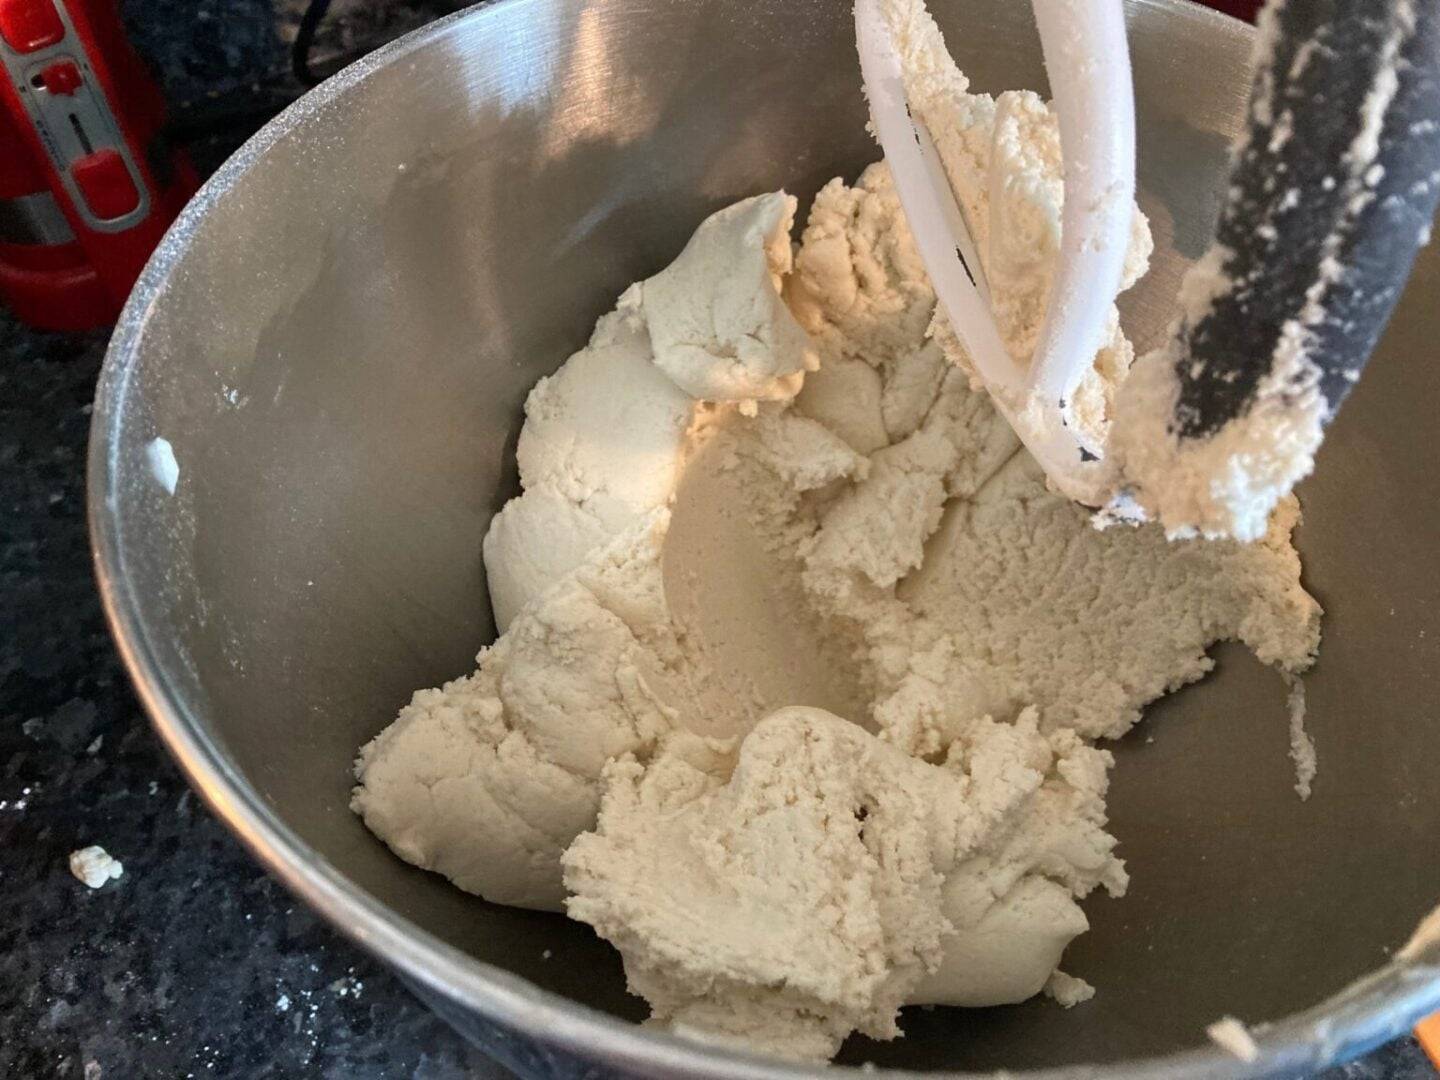
How to Make Cut-Out Sugar Cookies

- Cream the butter for 2-3 minutes until light and fluffy.
- Add sugars and continue to mix.
- Add egg and both extracts and mix well.
- Add flour and baking powder.
- Mix until it comes together then place in a baggie and place in freezer for half an hour to chill.
- Preheat oven to 375 degrees Fahrenheit.
- Remove and roll out dough to ⅓" thickness (approximately). (See my full tutorial here.)
- Cut out shapes and place on parchment lined cookie sheet.
- Place in preheated oven and bake for 10 - 11 minutes or until set. You don't want to over-bake.
- Set on wire rack to cool.
- Make sure the cookies are completely cool before you attempt to decorate them.
Decorating with Royal Icing

Royal icing is a favorite for sugar cookies because it creates a smooth, durable canvas perfect for detailed decorating. Its versatile consistency can be adjusted for either flooding large areas or for fine piping work, making it ideal for intricate designs.
Once dried, royal icing hardens into a glossy finish that not only enhances the cookie's appearance but also helps preserve its freshness. Plus, it accepts vibrant colors beautifully, allowing you to create elaborate, eye-catching designs that turn simple sugar cookies into true edible masterpieces.
Royal Icing Recipe
If you want the full scoop on royal icing, visit my Royal Icing post.
- 2-pound bag powdered sugar
- ½ cup plus 2 tablespoons warm water
- 3 tablespoons Wilton meringue powder
- 1 teaspoon vanilla extract
- ½ teaspoon almond extract
How to Make Royal Icing
This is so simple and easy!
Combine water, extracts, and meringue powder in a mixing bowl and whisk until combined and slightly frothy.
Add all of the sugar and mix on low speed for 5 minutes or until it begins to come together. Keep it on low speed the whole time.
Flood. . .or Piping?
Your royal icing is really thick so it will need to be thinned down to turn it into both flood and piping icings.
Roughly speaking, a flood icing (also called a 10-second icing) is about the consistency of honey. You want to add tiny drips of water to thin it down, a little at a time, until you reach the point where you can drag a knife or spoon through it and the line closes after ten seconds.
To make piping icing, you add far less water. You're looking for toothpaste consistency, perhaps a bit looser.
I pipe using tipless bags but you might want to start with bottles for the flood icing to have better control. I have a full tutorial for all of that on my Decorating with Royal Icing post.
Now that you have your recipes, it's time to talk about how I decorate my wedding cookies. They are beautiful but not as difficult as you might imagine. Create a work station and have everything you'll need in advance.
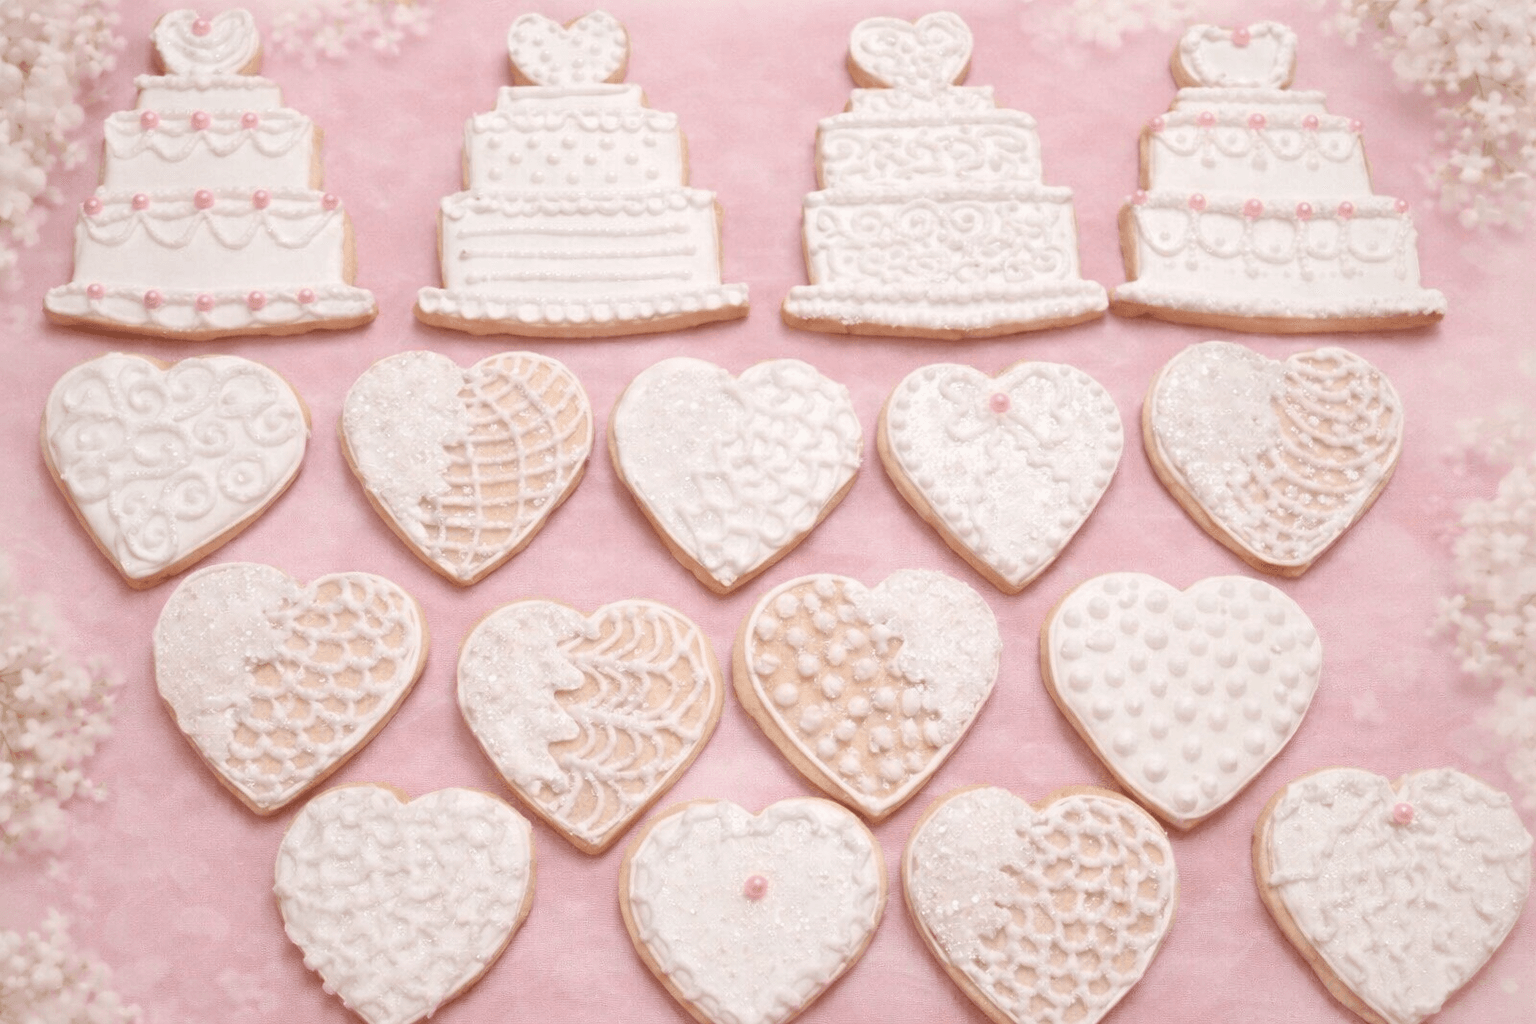
Heart Cookies (White)


Simple white heart cookies are a timeless treat that never fail to impress. These intricately designed cookies start with a smooth layer of white icing—flooded to create a flawless canvas—onto which delicate scrollwork is expertly piped.
In some variations, one half of the cookie is painted with detailed designs while the other half is adorned with elegant scrollwork on the bare cookie, and in others, a sprinkle of sanding sugar adds a subtle sparkle to the painted surface.
Classic, lovely, and delicious, these cookies make an exquisite gift and add a personal touch to any wedding celebration.
Heart Cookies (Bride and Groom)


These heart-shaped bride and groom cookies capture the elegance and whimsy of a wedding day. The bride cookies are meticulously hand-painted to resemble the delicate top of a wedding dress—they’re first flooded with a smooth white icing, then adorned with subtle pearlescent accents and intricate piping details that evoke the refined beauty of lace.
In contrast, the groom cookies boast a sophisticated tuxedo look, with a sleek black base accented by crisp white piping to mimic the formal style of a classic tuxedo. Together, these charming cookies offer a delightful and memorable touch to any wedding celebration.
Double Hearts
When you use a double heart cookie cutter you have the opportunity to create several different types of designs. I particularly love doing bride and groom images with tuxedoes and bridal gowns. These are favorites for wedding guests.
Mr. and Mrs. Cookies are also fun!


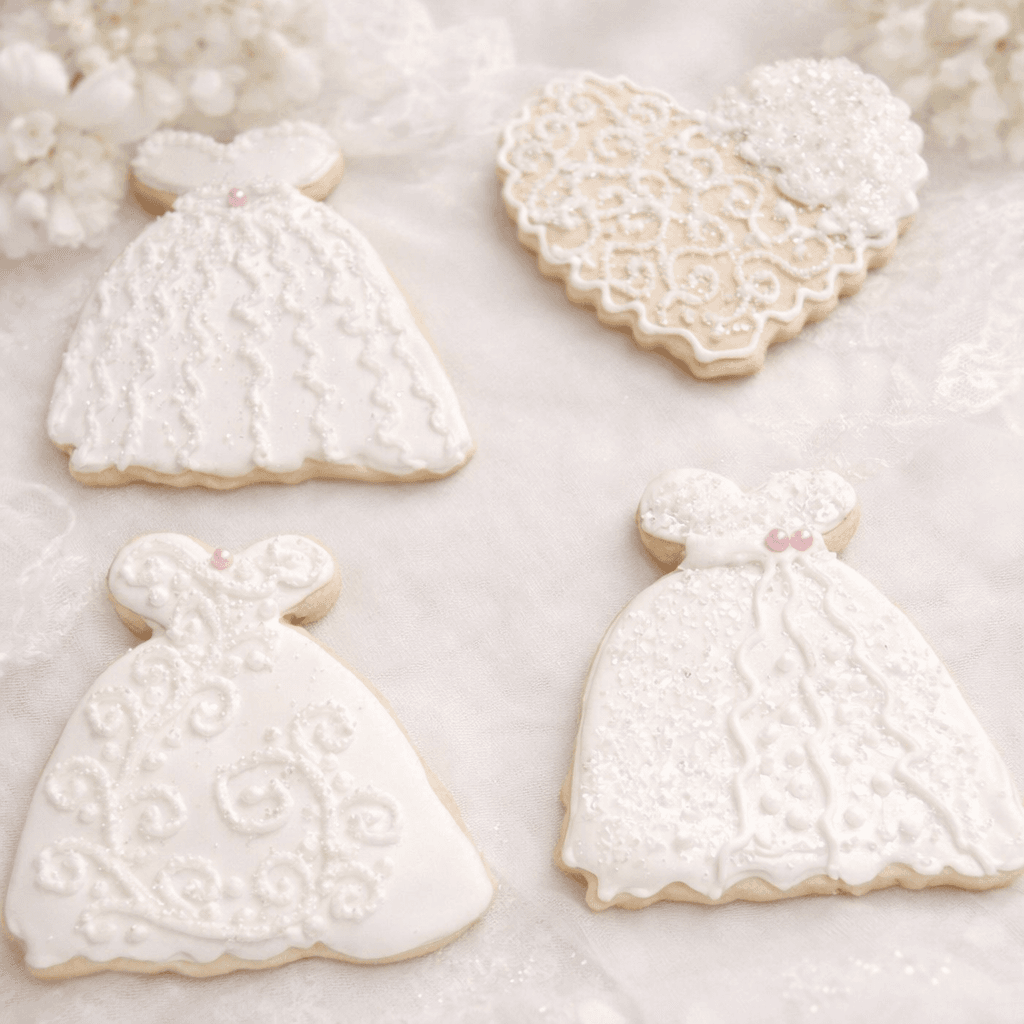
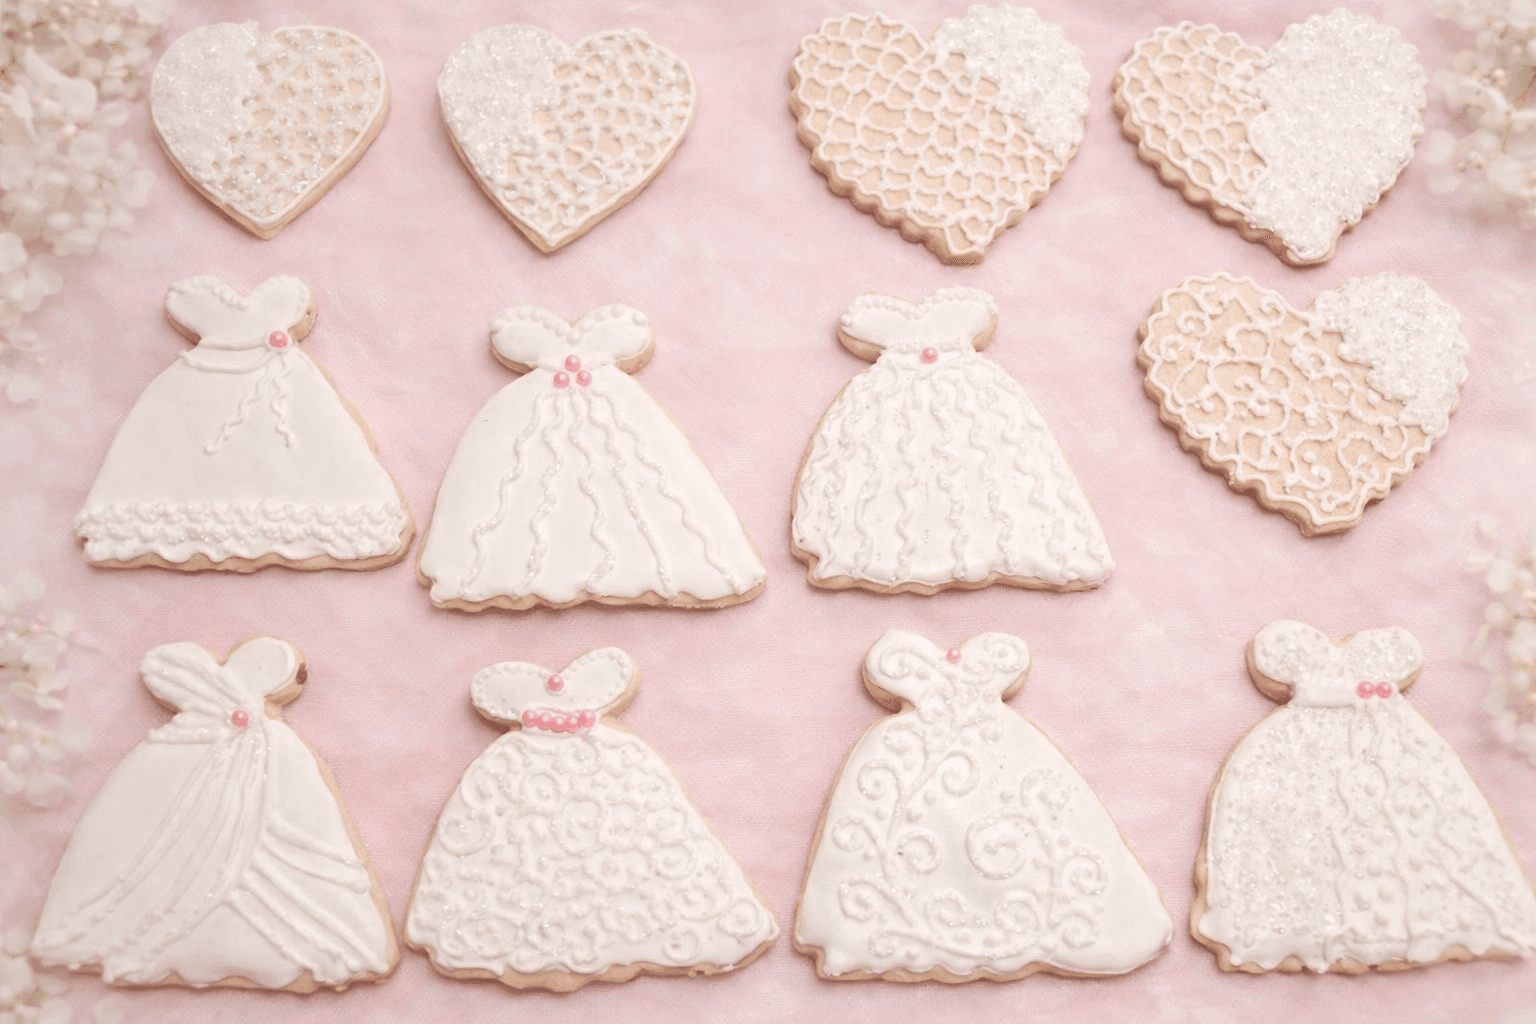
Bridal Gowns
These are perfect for your big day, or for a lovely bridal shower. When I make bridal gown cookies I usually start by flooding the cookies in white. After they've dried, I come on top of them with piping icing.
As you can tell from the photos below, I've tried a variety of scrolling techniques. I've even used different colors for accents. (Honestly? Those are my favorites!)


Lovebird Cookies


Don't you just love these simple little lovebird cookies? They're easier than they look. Just flood one side at a time. I usually start with the white side, then let it dry before adding the side with the color. You need to wait until the flood icing is completely dry before adding the details with piping icing. But the end result is absolutely lovely!
Note: I try to let my cookies dry 18-24 hours.


Engagement Cookies
I've made such sweet engagement photos! Ring cookies are a favorite and can be made in a variety of ways.
My favorites, though, are the sweet little proposal cookies. . .and they're super easy. Just flood a cookie in white, add dots around the edges and allow to dry overnight. The following day use an edible marker to sketch on the characters. You can then finish them off with a hair bow and glitter for the diamond ring. (So fun!)


That’s it for this post, friends! I hope you enjoyed my cookie recipe and wedding cookie styles.These cookies hold a special place in my heart and I love making people happy on their big day.
You can do the same! Get creative! Use your imagination. Wedding cookies are meant to be fun!
Additional Tips
Plan Your Palette:
Stick to a soft, coordinated color palette (like whites, blush pinks, golds, or sage greens) to keep your cookies looking elegant and cohesive. The first question I ask a bride is "What are your colors?" The second: "What is your theme?" These are critical questions.
Practice Piping First:
Before decorating your final wedding or bridal shower cookies, practice piping designs like scrollwork, dots, and flowers on a piece of parchment paper (or wax paper) to build confidence and consistency. This is the best way to learn, before you have to bake for someone's big day! (Honestly? Even after years of cookie decorating experience, I still mess up cookies from time to time.)
Use Flood and Detail Icing Separately:
Mix two consistencies of royal icing: a thinner one for flooding the base and a thicker one for detailed piping work. This helps prevent spreading and keeps your designs sharp.
Work in Layers:
Allow each icing layer to dry before adding the next to avoid smudges and create beautiful dimension (especially for florals, lace patterns, or lettering).
Invest in a Scribe Tool:
A simple scribe tool or toothpick can help smooth out icing, pop air bubbles, and sharpen small details.
Add Edible Accents:
Tiny edible pearls, gold leaf, or a light dusting of luster dust or sanding sugar can add a sophisticated, professional finish to your cookies.
Be Patient with Drying Time:
Fully drying decorated cookies (ideally overnight) ensures they stay crisp and beautiful, especially important if you're packaging them as favors.
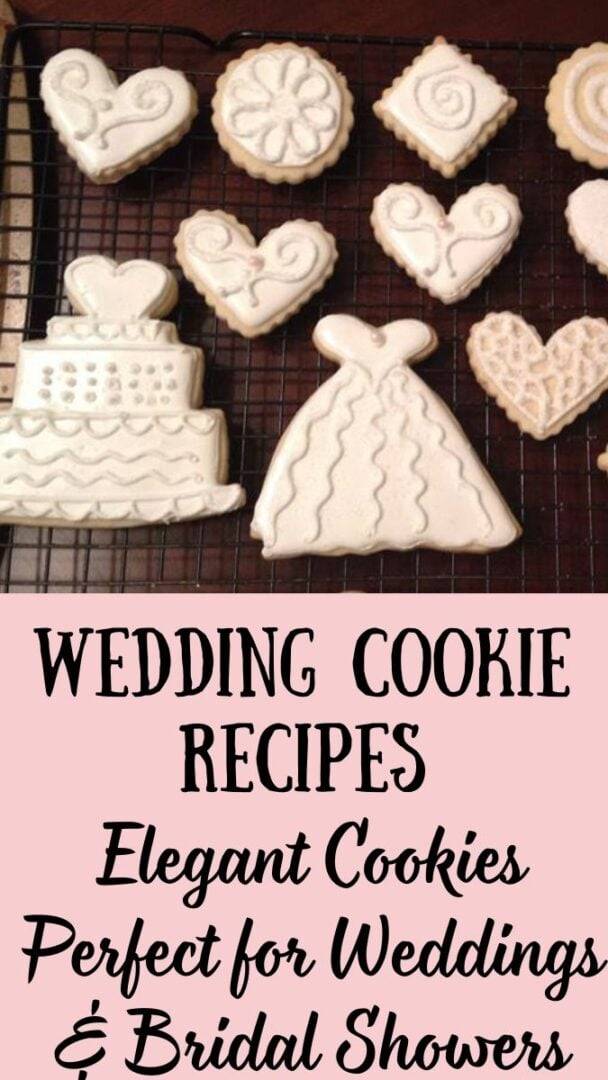
Elegant Wedding Cookie Ideas
Looking for beautiful cookies to include on a wedding dessert table? These elegant cookie recipes are perfect for weddings, bridal showers, and anniversary celebrations.
• Italian Wedding Cookies
• Mexican Wedding Cookies
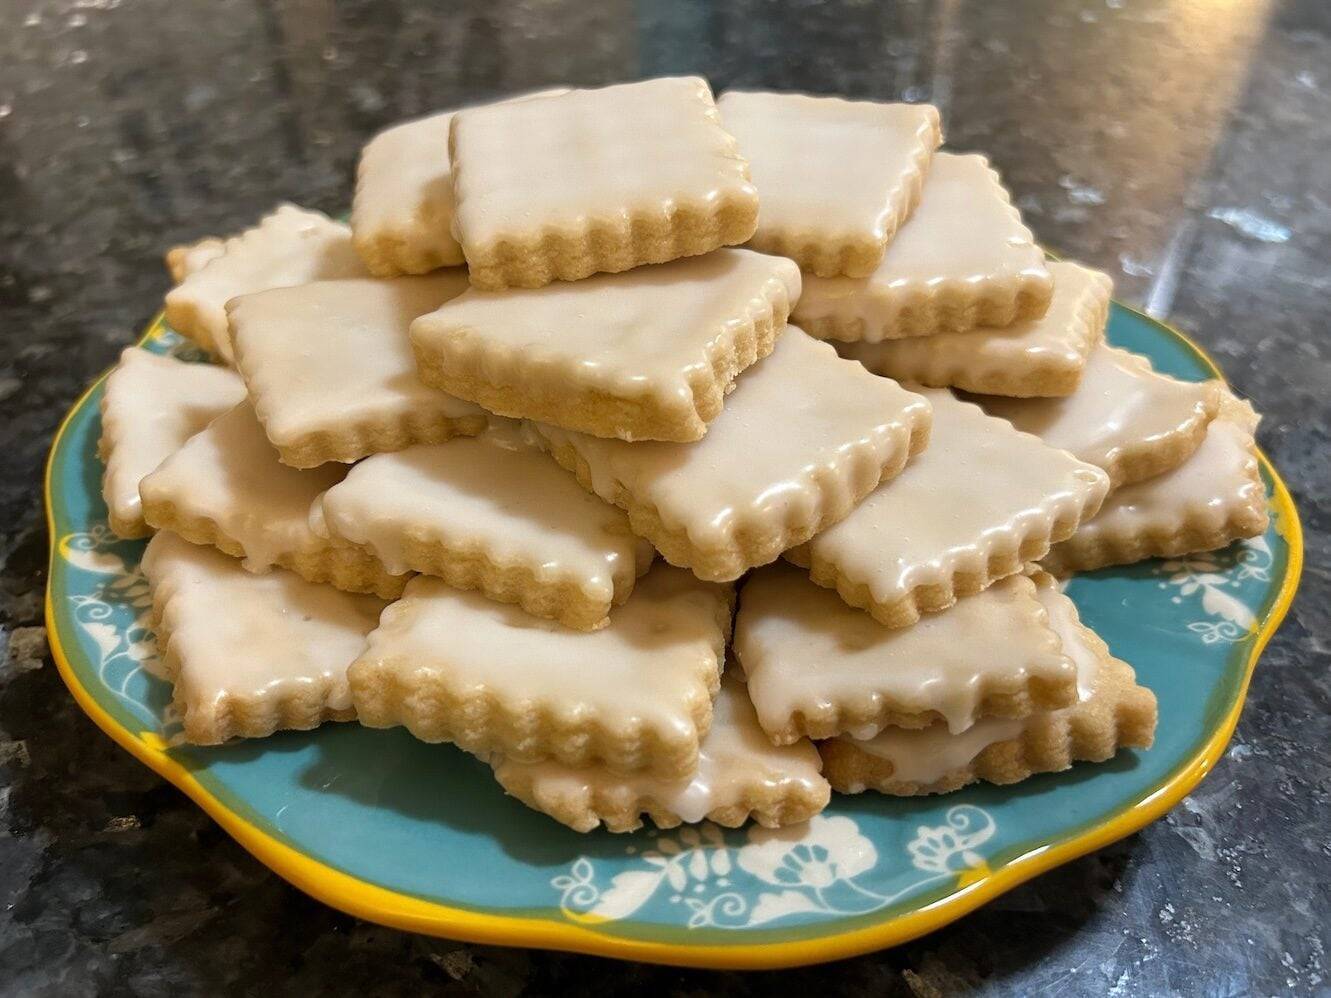
• French Butter Cookies
• Almond Shortbread with Almond Glaze
• Old-Fashioned Butter Cookies
• Classic Linzer Cookies
These cookies bring a timeless elegance to any wedding dessert display.
Creative Ways to Serve Wedding Cookies
Decorated cookies can be used in several creative ways during a wedding celebration.
Many couples display them on a wedding dessert table alongside cakes, cupcakes, and other bite-sized treats. Others package cookies in clear bags or decorative boxes so guests can take them home as wedding favors.
You can also arrange decorated cookies on tiered trays, dessert stands, or vintage platters to create a stunning focal point for the reception.
No matter how you serve them, beautifully decorated cookies add charm and personality to any wedding celebration.
If you make this recipe and love it, don’t forget to leave a review and a comment below. And while you're at it, go ahead and pin some photos to your Pinterest boards!


Loved this recipe? Get more like it straight to your inbox. Sign up for our newsletter now!
Happy decorating, friends!
But they who wait for the Lord shall renew their strength; they shall mount up with wings like eagles; they shall run and not be weary; they shall walk and not faint.
Isaiah 40:31 ESV
About the Author
Janice Thompson is an author, baker, and all-around mischief maker! She has overcome a host of baking catastrophes, including a toppled wedding cake, to learn more about the baking process. Janice has published over 165 books for the Christian market but particularly enjoys writing recipes and baking devotions. To learn more about Janice or to drop her a note, visit her About the Author page.

Cut-Out Sugar Cookies
Ingredients
- 2 sticks (one cup) salted butter (room temperature)
- 1 extra-large egg (must be extra-large)
- 1 cup powdered sugar
- ½ cup granulated sugar
- 1 teaspoon clear vanilla
- ½ teaspoon almond extract
- 3 cups flour
- 1 teaspoon baking powder
Instructions
Cream together the two sticks of butter. Add the sugars and egg, mixing well.
Next, add vanilla and almond extracts.
In a separate bowl whisk together the flour and baking powder. Add in increments to the creamy mixture, fully combining.
Chill the dough, and then roll using one of the methods indicated above (roller with detachable rings or doubled paint sticks).
Bake at 375 for ten minutes or your preference. Don’t over-bake.
Nutrition Information:
Yield: 30 Serving Size: 1Amount Per Serving: Calories: 83Total Fat: 1gSaturated Fat: 1gTrans Fat: 0gUnsaturated Fat: 0gCholesterol: 10mgSodium: 26mgCarbohydrates: 17gFiber: 0gSugar: 7gProtein: 2g
The nutrition information is a product of online calculators. I try to provide true and accurate information, but these numbers are estimates.

Easy Royal Icing
This simple and delicious royal icing is perfect for decorating those yummy cut-out sugar cookies.
Ingredients
- 3 tbl meringue powder
- ½ cup + 2 tablespoons water
- 1 teaspoon cream of tartar (omit this if you’re using Wilton’s meringue powder)
- 2 teaspoon clear vanilla extract
- ½ teaspoon real almond extract
- One bag powdered sugar (7 – 8 cups)
Instructions
- Put all items except powdered sugar into a mixing bowl. Mix until frothy (less than a minute).
- Add full bag powdered sugar and mix until incorporated (a few seconds).
Turn mixer on low and beat for five minutes non-stop until the icing is meringue-like in texture. Immediately cover with plastic wrap (touching the icing) and a damp towel above that. - Now it’s time to color your icing. Scoop out about a cup of the icing into a small bowl and add your coloring gel.
- (Note: Don’t use water-based food colorings, as they add liquid to the recipe.) Mix thoroughly.
- Add tiny drops of water until you get the colored icing to piping (toothpaste) consistency.
- Scoop out half of it and put it into a piping bag with #2 tip. With the remaining icing in the bowl, add tiny bits of water (stirring non-stop by hand) until it reaches honey consistency.
- You know you’ve reached the right consistency when you can drag a knife through it and it takes about 10 seconds for the line to close up again.
- You can either put this flood consistency icing in a piping bag with a #2 tip or a tipless bag. You can also use a food-safe craft bottle with tip, but be aware that flooding with the bottle method often leads to air bubbles in the icing.
- Repeat the above process making different colors.
Notes
For more on the decorating process, see my Tips for Cookie Decorating post.