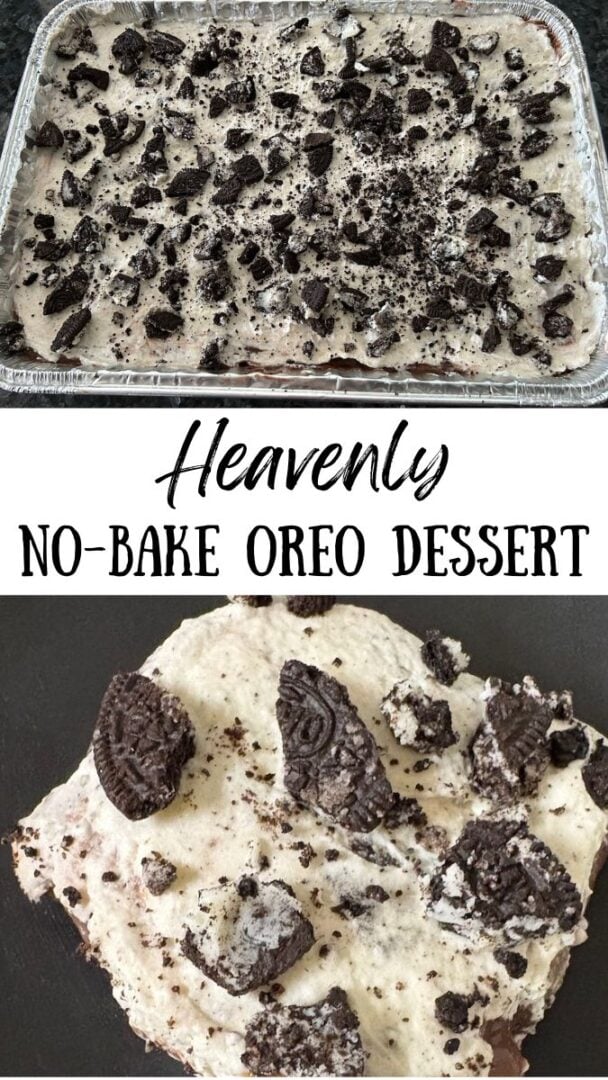
Heavenly No Bake Oreo Dessert
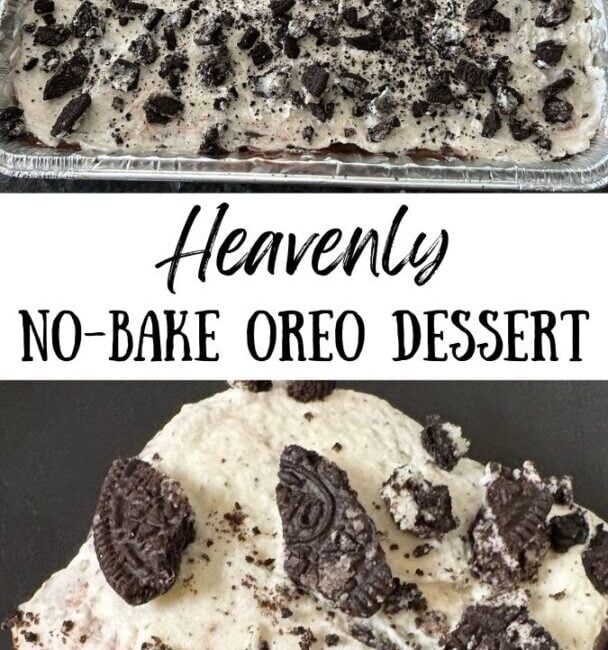
This Heavenly No-Bake Oreo Dessert is rich, creamy, and irresistibly layered with crushed Oreos, fluffy whipped topping, and smooth pudding. Easy to assemble and perfect for potlucks, holidays, or last-minute desserts, it’s a guaranteed crowd-pleaser.
The History of Oreos
Oreos were first introduced by the National Biscuit Company—now known as Nabisco—on March 6, 1912, in New York City. These sweet treats were originally called "Oreo Biscuits.” (I pause to think about the fact that folks in England call cookies “biscuits” to this day.
The Oreo cookie featured a simplistic but effective design: two chocolate wafers with a creamy vanilla filling in the middle. It quickly rose in popularity (and it’s easy to see why)!
More than 100 years have passed, but Oreos are just as popular, if not more so. Did you know that they’re one of the top cookies in the world? It’s true! And they’re not just good for eating straight from the package. They also make a lovely addition to desserts like this one!
A Simple, No-Bake Dessert
That’s exactly what I was looking for, friends! I wanted something I could whip up in a hurry. I happen to have an amazing recipe for Oreo trifle (the mint version is over the top) but it has a layer of chocolate cake (or brownies).
I happened to be taking dinner to a family member who just had surgery and wanted something easy. So, I stumbled across a picture of this easy dessert on Pinterest and decided to whip it up. Like I said, my Mint Oreo Trifle is one of my favorites, so I figured this dessert would be equally as good.
Why You’ll Love This Dessert
- No Oven Needed: Perfect for hot summer days or busy holiday baking seasons.
- Quick & Easy: Comes together in minutes with simple ingredients.
- Crowd-Pleaser: Everyone loves Oreos — this dessert disappears fast at parties.
- Make Ahead Friendly: Chill overnight for even better flavor and convenience.
- Versatile: Serve in a 9x13 dish, parfait cups, or even as mini desserts in jars.
Oreo Dessert Ingredients

You will find a full printable recipe card at the bottom of this post but here's a quick look at what you'll need to make this luscious dessert. These are simple ingredients you can find at any grocery store.
Chocolate Crust
- 24 finely crushed Oreos
- 6 tablespoons melted butter
- 2 tablespoons melted butter to coat pan
Chocolate Pudding
- Instant chocolate pudding mix (111 grams)
- 2 cups whole milk, cold
Whipped Cream
- 2 cups cold whipping cream
- 1 teaspoon vanilla extract
- ¼ cup granulated sugar
- (Alternatively, you can use an 8-ounce tub of Cool Whip)
Creamy Filling
- 8 ounces (one block) room temperature cream cheese
- ½ cup granulated sugar
- 10 crushed Oreos
Crumb Topping
- 8 Crushed Oreos
That’s it! Nothing to bake, but plenty to love!
How to Make this No-Bake Oreo Dessert
Crush 24 Oreos in a food processor. (Or, put them in a gallon size baggie and use a rolling pin to take out some of your aggression.)


Melt butter in a small bowl.
Pour two ounces of the butter into the bottom of a 9x13-inch casserole dish.

Add the crushed Oreos to the bowl with the remaining melted butter. Mix well until combined.

Press crust into the bottom of the buttered dish.

Cover and place in the freezer for 15-20 minutes to firm up.
While the crust is chilling, make the pudding by combining the boxed mix and cold milk. Stir well. Cover and place in the refrigerator to chill.


Next, make your whipped cream. Place the heavy cream into a mixer with whisk attachment and beat it until stiff peaks form. Add sugar and vanilla, mixing only until incorporated. Set aside.
Make the creamy filling: In a separate bowl, beat the room temperature cream cheese until light and fluffy. Add ½ cup sugar and set aside.

Gently fold the whipped cream into the cream cheese mixture.


Add crushed Oreos.

It’s time to bring it all together!
Remove the dish from the freezer.
Spread half of the delicious filling over the crust and spread evenly.

Add all of the chocolate pudding.

Add the rest of the filling.

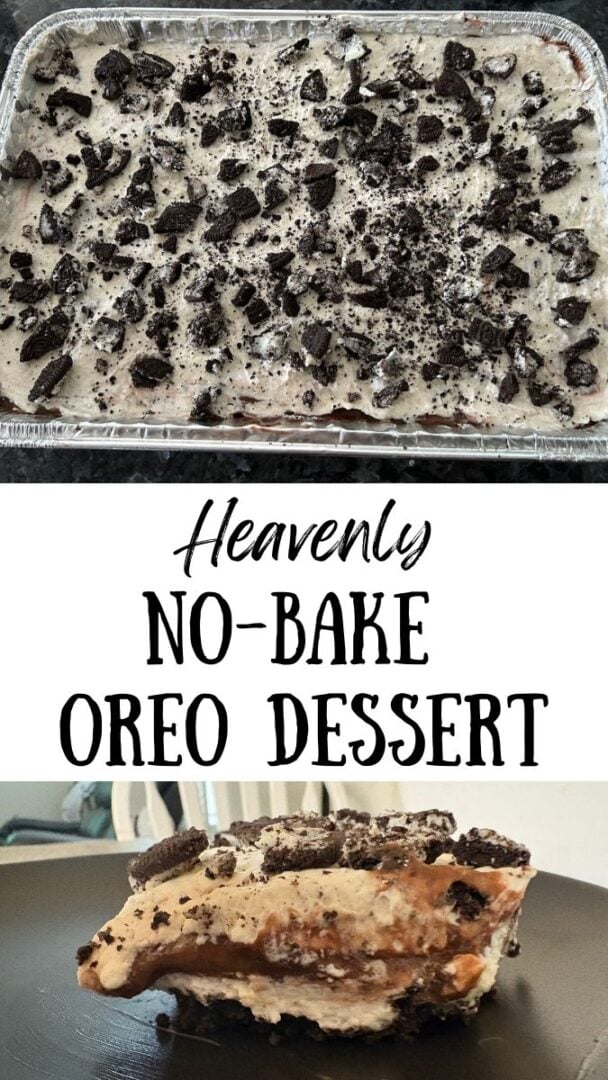
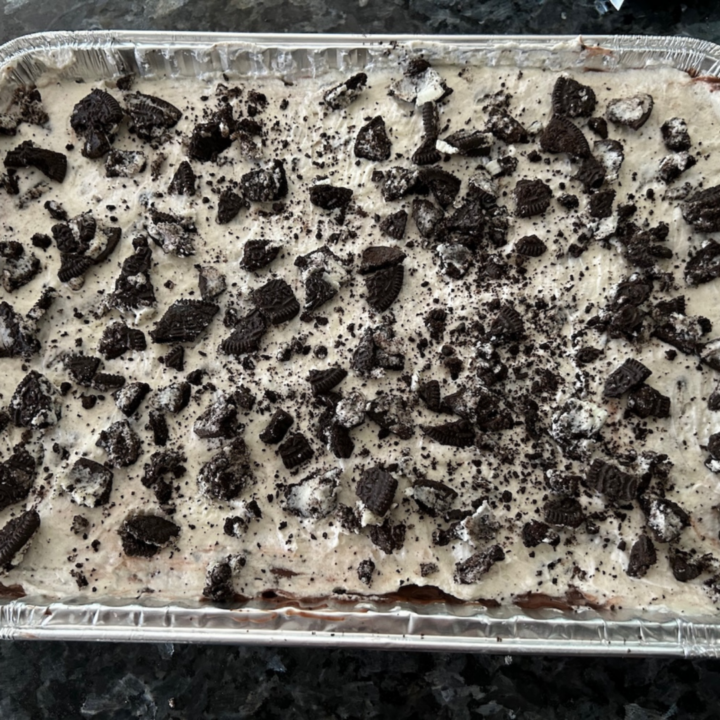
Sprinkle the remaining crushed Oreos on top.

Serve and enjoy!

Store leftovers tightly covered in the refrigerator. They should stay fresh for 3-4 days.
What to Expect from this Dessert
It’s creamy, it’s sweet, it’s loaded with chocolate flavor. This is truly the ultimate dessert. Loved by kids and adults, alike, it’s guaranteed to make your family (or guests) happy. I took this to my daughter’s house and my grandkids flipped! Just looking at it made them happy. And, why not? It’s truly a feast for the eyes. . .and the stomach.
Variations to this Recipe
As I mentioned above, there are a ton of recipes for this dish online and it’s very similar to my trifle. But there are some other ways to make this dish.
- In a hurry? Just use a container of Cool Whip.
- Want different layers? Don’t merge the whipping cream and cream cheese filling. Instead, start with the cream cheese mixture atop the crust (with crushed Oreos), then add pudding, then top with whipped cream and more crushed Oreos.
- Use Mint Chocolate Oreos and York Peppermint Pudding: If you love mint chocolate, you’ll flip over this version!
- Golden Vanilla Oreos: Ready for something simple? Use Golden Oreos, Vanilla pudding, and leave the other ingredients the same.
- Add some coconut to the Golden Vanilla version. (This would be delicious!)
- Make it an Almond Joy! Add coconut to the chocolate version and throw in some slivered almonds. (Delicious!)
No matter how you make it, your guests will be glad you did. This is such a crowd-pleaser!
Frequently Asked Questions
Can I use store-brand sandwich cookies instead of Oreos?
Yes, any chocolate sandwich cookie will work, though Oreos give the most authentic flavor.
How long does this dessert need to chill?
At least 2–3 hours, but overnight is best for firm layers and richer flavor.
Can I make this with different Oreos?
Absolutely! Try Golden Oreos, Mint Oreos, or seasonal flavors for fun variations.
Can this dessert be frozen?
Yes! Freeze in slices for up to a month. Thaw in the fridge before serving.
What can I substitute for Cool Whip?
Homemade whipped cream works beautifully, though it won’t hold as long in the fridge.
Other Chocolate Desserts from Out of the Box Baking:
Here are some other fun chocolate desserts from Out of the Box Baking!
- Easy Chocolate Coconut Balls: These Easy Chocolate Coconut Balls are chewy, chocolate-dipped treats packed with sweet coconut flavor — the perfect no-bake bite for holidays, parties, or bake sales.
- Ultimate Chocolate Cake: This Ultimate Chocolate Cake is rich, moist, and deeply decadent — the perfect indulgent dessert for birthdays, holidays, or bake sales.
- Ultimate Chocolate Chip Cookies with Brown Butter: These Ultimate Chocolate Chip Cookies with Brown Butter are soft, chewy, and loaded with rich, nutty flavor — a gourmet upgrade to the classic favorite.”
- Double Mint Chocolate Cookies: These Double Mint Chocolate Cookies are fudgy, refreshing, and packed with chocolate chips and cool mint flavor — a crowd-pleasing treat for any occasion.”
- Mint Oreo Trifle: This Mint Oreo Trifle layers crushed Oreos, creamy pudding, and whipped topping into a cool, minty dessert that’s as easy as it is irresistible.
- Looking for a crowd-pleasing dessert? Browse my Pies & Cobblers Hub for ideas that always deliver.
- Creamy, Dreamy No-Bake Favorites: From cheesecakes to fluff desserts, these no-bake treats are rich, smooth, and totally irresistible.
That’s it for this post, friends!
I hope you enjoyed this delicious No-Bake Oreo Dessert recipe.
If you make this recipe and love it, don’t forget to leave a review and a comment below. And while you're at it, go ahead and pin some photos to your Pinterest boards!


Loved this recipe? Get more like it straight to your inbox. Sign up for our newsletter now!
About the Baker
Janice is the baker and blogger behind Out of the Box Baking, where she shares creative, approachable recipes for home bakers of all skill levels. From no-bake desserts like this Oreo classic to doctored cake mix creations, her goal is to make baking fun, stress-free, and a little outside the box.
Follow Me on Social Media
"Above all, keep loving one another earnestly, since love covers a multitude of sins."
1 Peter 4:8 ESV
Heavenly No-Bake Oreo Dessert
This Heavenly No Bake Oreo Dessert is rich, creamy, and irresistibly layered with crushed Oreos, fluffy whipped topping, and smooth pudding. Quick to assemble and perfect for any occasion, it’s the ultimate crowd-pleasing treat!
Ingredients
- Chocolate Crust
- * 24 finely crushed Oreos
- * 6 tablespoons melted butter
- * 2 tablespoons melted butter to coat pan
- Chocolate Pudding
- * Instant chocolate pudding mix (111 grams)
- * 2 cups whole milk, cold
- Whipped Cream
- * 2 cups cold whipping cream
- * 1 teaspoon vanilla extract
- * ¼ cup granulated sugar
- * (Alternatively, you can use an 8-ounce tub of Cool Whip)
- Creamy Filling
- * 8 ounces (one block) room temperature cream cheese
- * ½ cup granulated sugar
- * 10 crushed Oreos
- Crumb Topping
- * 8 Crushed Oreos
Instructions
- Crush 24 Oreos in a food processor. (Or, put them in a gallon size baggie and use a rolling pin to take out some of your aggression.)
- Melt butter in a small bowl.
- Pour two ounces of the butter into the bottom of a 9x13-inch casserole dish.
- Add the crushed Oreos to the bowl with the remaining melted butter.
Mix well until combined. - Press crust into the bottom of the buttered dish.
- Cover and place in the freezer for 15-20 minutes to firm up.
- While the crust is chilling, make the pudding by combining the boxed mix and cold milk. Stir well. Cover and place in the refrigerator to chill.
- Next, make your whipped cream. Place the heavy cream into a mixer with whisk attachment and beat it until stiff peaks form. Add sugar and vanilla, mixing only until incorporated. Set aside.
- Make the creamy filling: In a separate bowl, beat the room temperature cream cheese until light and fluffy. Add ½ cup sugar and set said.
- Gently fold the whipped cream into the cream cheese mixture.
- Add crushed Oreos.
- It’s time to bring it all together! Remove the dish from the freezer.
- Place half of the delicious filling on top of the crust and spread evenly.
Add all of the chocolate pudding. - Add the rest of the filling.
- Sprinkle the remaining crushed Oreos on top.
- Serve and enjoy! Store leftovers tightly covered in refrigerator. They should stay fresh for 3-4 days.