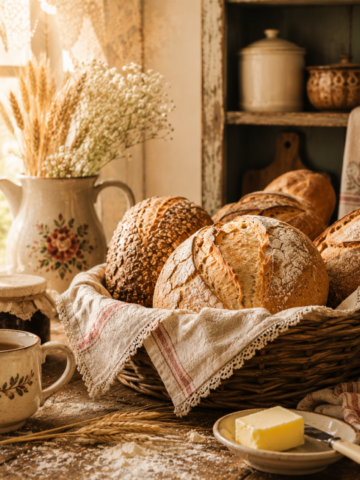
How to Make Same-Day Sourdough Without Yeast
Learn how to make soft, rustic sourdough bread in one day without yeast. Simple ingredients, no long wait, perfect for beginner bakers.

What Is Same-Day Sourdough Without Yeast?
(And can it really be baked in one day?)
I can’t tell you how many websites I’ve read where people are asking this question. Everyone loves sourdough, but few people want to wait until tomorrow to eat it.
With that in mind, I created a hybrid recipe, one with a tiny bit of yeast in it. I use it in a pinch. It tastes delicious and has a soft crumb. You're going to be so surprised at how easy and fast this one is, compared to the overnight version!
It's got that lovely chewiness of a traditional sourdough, which is terrific! And all without adding any yeast!
This version does, however, require preparation.
And patience.
And willingness to change how you’ve been doing things all along.
Creatures of Habit
That’s what most of us are, right? Maybe you’ve had a certain way of baking bread for years, but you’re ready to experiment with something new. This is a fun way to start.
Two things you need to know going in:
You have to start in the morning (around 8:00) with active starter. That means you must feed your starter before bed.
You have to make sure your kitchen is between 70 and 75 degrees Fahrenheit. If it’s a cold day you’ll want to do your autolyse in the oven with the light on (or, as I like to do mine: in the microwave with a mug of hot water next to it).
Sourdough Ingredients You'll Need
Let’s start by talking about what you’ll need. These are the “usual” sourdough ingredients, but put together in a slightly different order.
- 350 grams lukewarm/warm water (1 ½ cups)
- 100 grams active, bubbly sourdough starter (½ cup)
- 500 grams bread flour (all-purpose is fine) (4 cups, loosely scooped and leveled)
- 10 grams salt (1 ¾ teaspoons)
Disclaimer: This recipe was originally developed using weight measurements for accuracy. Flour can vary greatly depending on how it's scooped (packed vs. loose), and sourdough starter densities can differ. For best results, use a digital kitchen scale. Cup conversions are provided for convenience but may affect texture and hydration.
Step-by-Step Instructions for Same-Day Sourdough
As I mentioned above, you must start with an active, bubbly starter. Feed it late at night, before you go to bed. And start this process early. I’ve created a little timeline for you to follow:
8:00 A.M.
Using a digital scale, measure water and starter in a large glass bowl.

Whisk it together with a bread whisk.
Add bread flour.
Mix with whisk until it becomes too thick to work with, then either finish it by hand or with a bowl scraper.

You will end up with a shaggy dough. Cover and set in a warm spot.
You might be wondering about the salt. We’re not going to add that yet.
9:00 A.M.
It’s time to do your first (of four) stretch and folds.
To do a stretch and fold, wet your hands and then reach down and grab the dough. Pull up and drop it in the center of the bowl.

Turn the bowl and quarter turn and do it again.
Keep turning until you’ve stretched and folded all of the dough.
You’ll notice that it gets firmer as you go along.
Cover and set in a warm spot.

9:30 A.M.
Do your second round of stretch and folds.
You can add the salt to this one.


If you’re adding inclusions (like cheddar and jalapeno, for example) this is the time to gently fold them in.
10:00 A.M.
Do your third set of stretch and folds.
10:30 A.M.
Do your fourth set of stretch and folds.
Cover and set in a warm spot for three hours.

1:30 P.M.
Prepare a lightly floured surface
Flour the inside of your banneton (or other bowl).
Some people use a tea towel or cheese cloth in their banneton. Others just flour it.
(If you use a tea towel you won’t see the lines from the banneton in your bread loaf.)
It’s time to shape your dough.
I usually (gently!) stretch my dough into a rectangle, then fold it envelope style—right over center, then left over center.

Once it’s folded, roll it up from the bottom up.
You can now (gently!) shape the dough into a tight ball by pushing it away from you and then pulling it toward you, then pivoting the dough ball. Continue the push and pull until the top of the dough is smooth.

Flip the dough over into the prepared banneton.

Pinch the seam together with your fingertips.
1:45 P.M.
Cover with a tea towel and place in the refrigerator for three hours.
4:00 P.M.
Place empty dutch oven (with lid) in the oven at 450 degrees.
4:45 P.M.
Crumple a piece of parchment paper and set aside.
Remove bread from refrigerator.

Place the parchment paper on top of the banneton and flip the loaf out. Don't worry if it looks a bit flat. Mine always do, but they sure puff up in the oven!

Score the bread using a lame or sharp knife. I usually make an arc on the right side, cutting about half an inch deep on the diagonal. Then I sometimes do something more decorative on the left if I’m feeling fancy.

5:00 P.M.
Carefully open oven and take the lid off of the dutch oven.
Gently ease the bread loaf into the pan, being careful not to burn yourself.

Add four ice cubes to the pan (gently lifting the parchment paper in four separate spots to drop the cube). You’ll appreciate the steam that the ice cubes create.
Put the lid back on and bake for 20 minutes.
At the 20-minute mark, remove the lid. It's time to check your oven spring!
Oven spring refers to the initial burst of rise that happens during the first 15–20 minutes of baking, especially in a preheated Dutch oven. It’s caused by trapped gases expanding rapidly as the dough hits high heat, before the crust fully sets. It's a great sign that your dough is well-fermented and shaped properly!
Now bake for 20 more minutes with the lid off.

Check the temperature of the bread with a thermometer. Ideally, it should be between 200 and 210 degrees Fahrenheit.

5:40 P.M.
Let the bread sit for a full hour before cutting.

6:40 P.M.
Cut with a sharp bread knife.

Serve and enjoy!

Note: If you get started earlier in the day, you can definitely leave this loaf in the refrigerator for a longer period of time. In fact, you can make this loaf the usual way (baking the following day) if you like.
Enjoy This Quick, Printable Guide:

Tips for Better Texture and Flavor
- don’t overmix
- oven temperature matters
- how to avoid dense bread
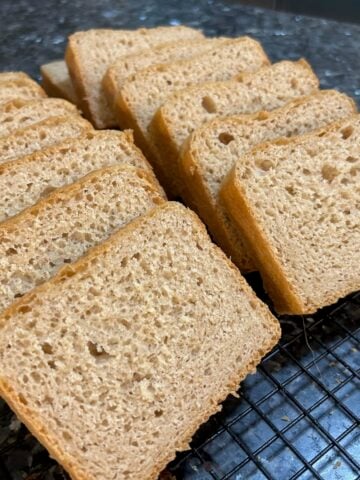
What to Expect from this Loaf

I don’t know about you, but I love a good loaf of sourdough. I’m crazy about it, in fact. But, as I told my friends a few weeks back, “I’m too old for two-day bread. I need a one-day bread recipe, please!"
But, seriously, at my age I truly do prefer to wrap up the bake in the same day as the mixing. So, I am happy to have a way to make & bake in one day. I think the texture is pretty good in this loaf. Waiting to add the salt helps with that. And the taste is divine! I think you’ll love this easy loaf!
Variations to this Recipe
Of course, there are always ways to change this up. You might be interested in adding inclusions. Here are a few I’ve tried:
Lemon-berry: I love to make a lemon blueberry (or lemon blackberry) loaf. Just add the zest of two lemons (mixed with a couple tablespoons of sugar), during the second stretch and fold. Berries (lightly tossed in flour) can be added just before the shaping.
Jalapeno Cheddar: This is my favorite, by far! Chop up 1 ½ - 2 jalapeños (with or without the seeds, your choice). Toss them in a tablespoon of flour and add during the second stretch and fold. Add 6 ounces of cheese (I prefer to cut in small cubes) at the same time, or even later, before shaping.
Honey-Oat: I love to add half a cup of oats and a quarter cup of honey to my dough. Then I add more oat on top (usually brushing the loaf with water before adding them).
Dark Chocolate-Raspberry: I’m just making this version today and will let you know how it turns out! The fresh raspberries were lightly coated in flour, before adding (just before shaping). ⅔ cup of dark chocolate chips went into the loaf during the second stretch and fold.
Questions People Are Asking
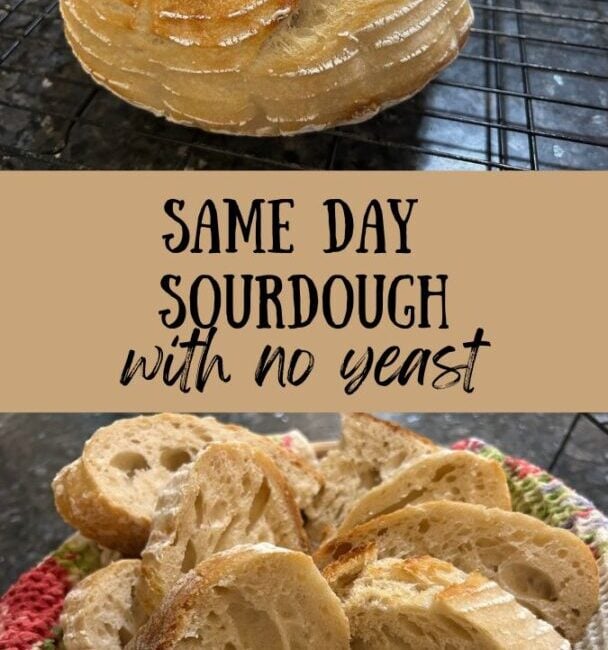
Why doesn’t my same-day sourdough have large holes?
Same-day sourdough tends to be less aerated than traditional two-day loaves. That’s because the dough has less time to ferment and develop structure. For a more open crumb, ensure your starter is active and bubbly and be gentle during shaping. As you can see from the pictures, I was working with a bubbly starter that produced a lot of aeration. . .and all in one day!
How do I know my sourdough starter is ready to use?
Your starter should pass the float test—drop a spoonful into a glass of water and see if it floats. It should also look bubbly, smell pleasantly tangy, and have doubled in size after feeding.
Can I refrigerate the dough longer than three hours?
Absolutely. While this recipe is written for same-day baking, you can refrigerate the shaped loaf longer (even overnight) if you start early enough. This may actually improve the flavor and texture.
Why wait to add the salt?
Delaying salt gives the dough time to fully hydrate during the autolyse phase, resulting in a better texture. Salt can also tighten gluten too early, which might affect fermentation.
Other Sourdough Recipes from Out of the Box
The list is growing, folks! Here are some of my favorites:
That’s it for this post, friends!
I hope you enjoyed this delicious recipe.
If you make this recipe and love it, don’t forget to leave a review and a comment below. And while you're at it, go ahead and pin some photos to your Pinterest boards!


Loved this recipe? Get more like it straight to your inbox. Sign up for our newsletter now!
About the Author
Janice Thompson is an author, baker, and all-around mischief maker! She has overcome a host of baking catastrophes, including a toppled wedding cake, to learn more about the baking process. Janice has published over 165 books for the Christian market but particularly enjoys writing recipes and baking devotions. To learn more about Janice or to drop her a note, visit her About the Author page.

Same Day Sourdough (Without Yeast)
If you’re in a hurry to make a loaf of sourdough but you don’t want to add yeast, this is the recipe for you. Keep reading to discover these same-day sourdough secrets!
Ingredients
- 350 grams lukewarm/warm water (1 ½ cups)
- 100 grams active, bubbly sourdough starter (½ cup)
- 500 grams bread flour (all-purpose is fine) (4 cups, loosely scooped and leveled)
- 10 grams salt (1 ¾ teaspoons)
Instructions
8:00 A.M.
Using a digital scale, measure water and starter in a large glass bowl.
Whisk it together with a bread whisk.
Add bread flour.
Mix with whisk until it becomes too thick to work with, then either finish it by hand or with a bowl scraper.
You will end up with a shaggy dough. Cover and set in a warm spot.
You might be wondering about the salt. We’re not going to add that yet.
9:00 A.M. It’s time to do your first (of four) stretch and folds.
To do a stretch and fold, wet your hands and then reach down and grab the dough. Pull up and drop it in the center of the bowl.
Turn the bowl and quarter turn and do it again.
Keep turning until you’ve stretched and folded all of the dough.
You’ll notice that it gets firmer as you go along.
Cover and set in a warm spot.
9:30 A.M.
Do your second round of stretch and folds.
You can add the salt to this one.
If you’re adding inclusions (like cheddar and jalapeno, for example) this is the time to gently fold them in.
10:00 A.M.
Do your third set of stretch and folds.
10:30 A.M.
Do your fourth set of stretch and folds.
Cover and set in a warm spot for three hours.
1:30 P.M.
Prepare a lightly floured surface
Flour the inside of your banneton (or other bowl).
Some people use a tea towel in their banneton. Others just flour it.
(If you use a tea towel you won’t see the lines from the banneton in your bread loaf.)
It’s time to shape your dough.
I usually (gently) stretch my dough into a rectangle, then fold it envelope style—right over center, then left over center.
Once it’s folded, roll it up from the bottom up.
You can now shape the dough into a tight ball by pushing it away from you and then pulling it toward you, then pivoting the dough ball. Continue the push and pull until the top of the dough is smooth.
Flip the dough over into the prepared banneton.
Pinch the seam together with your fingertips.
1:45 P.M.
Cover with a tea towel and place in the refrigerator for three hours.
4:00 P.M.
Place empty dutch oven (with lid) in the oven at 450 degrees.
4:45 P.M.
Crumple a piece of parchment paper and set aside.
Remove bread from refrigerator.
Place the parchment paper on top of the banneton and flip the loaf out.
Score the bread using a lame or sharp knife. I usually make an arc on the right side, cutting about half an inch deep on the diagonal. Then I sometimes do something more decorative on the left if I’m feeling fancy.
5:00 P.M.
Carefully open oven and take the lid off of the dutch oven.
Gently ease the bread loaf into the pan, being careful not to burn yourself.
Add four ice cubes to the pan (gently lifting the parchment paper in four separate spots to drop the cube). You’ll appreciate the steam that the ice cubes create.
Put the lid back on and bake for 20 minutes.
Remove the lid and bake for 20 more minutes.
Check the temperature of the bread with a thermometer. Ideally, it should be between 200 and 210 degrees Fahrenheit.
5:40 P.M.
Let the bread sit for a full hour before cutting.
6:40 P.M.
Serve and enjoy!
Note: If you get started earlier in the day, you can definitely leave this loaf in the refrigerator for a longer period of time. In fact, you can make this loaf the usual way (baking the following day) if you like.
Notes
Disclaimer: This recipe was originally developed using weight measurements for accuracy. Flour can vary greatly depending on how it's scooped (packed vs. loose), and sourdough starter densities can differ. For best results, use a digital kitchen scale. Cup conversions are provided for convenience but may affect texture and hydration.
Nutrition Information:
Yield: 15 Serving Size: 1Amount Per Serving: Calories: 132Total Fat: 1gSaturated Fat: 0gTrans Fat: 0gUnsaturated Fat: 0gCholesterol: 0mgSodium: 260mgCarbohydrates: 27gFiber: 1gSugar: 0gProtein: 4g
The nutrition information is a product of online calculators. I try to provide true and accurate information, but these numbers are estimates.
Therefore encourage one another and build one another up, just as you are doing.
1 Thessalonians 5:11 ESV