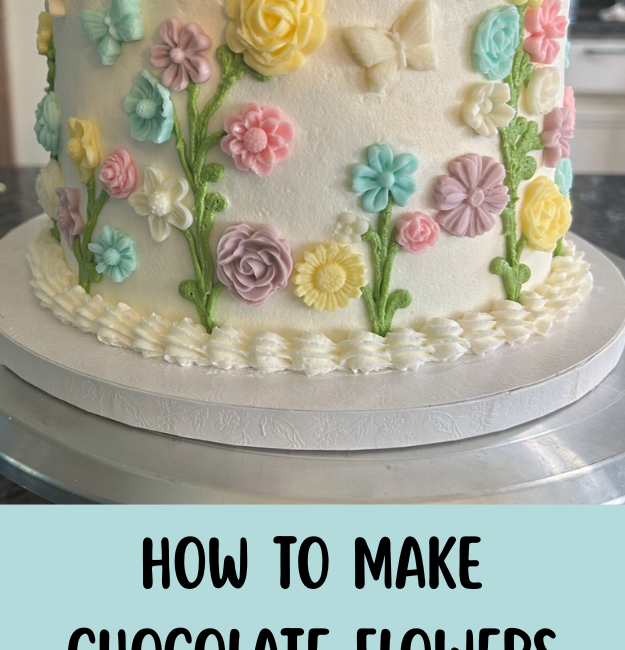
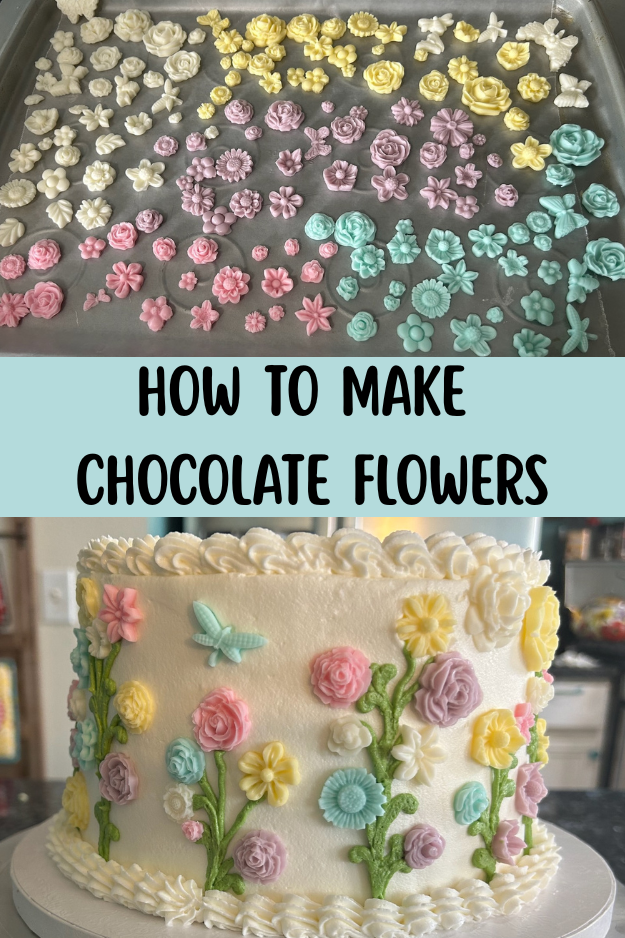
How to Make Chocolate Flowers Using Silicone Fondant Molds
Skip the fondant! Make gorgeous chocolate flowers with silicone molds and almond bark for cakes, cupcakes, petit fours, cake pops, and desserts.

If you've ever admired beautiful fondant flowers on cakes but dreaded the work involved, I have exciting news for you. I recently discovered a simple decorating hack that may have changed the way I decorate cakes forever.
While preparing my granddaughter's birthday cake, I found myself with several colors of leftover melted almond bark from other baking projects. Rather than throw it away, I decided to experiment. I had recently purchased a few silicone fondant molds and wondered if they might work with almond bark.
The results were even better than I expected.

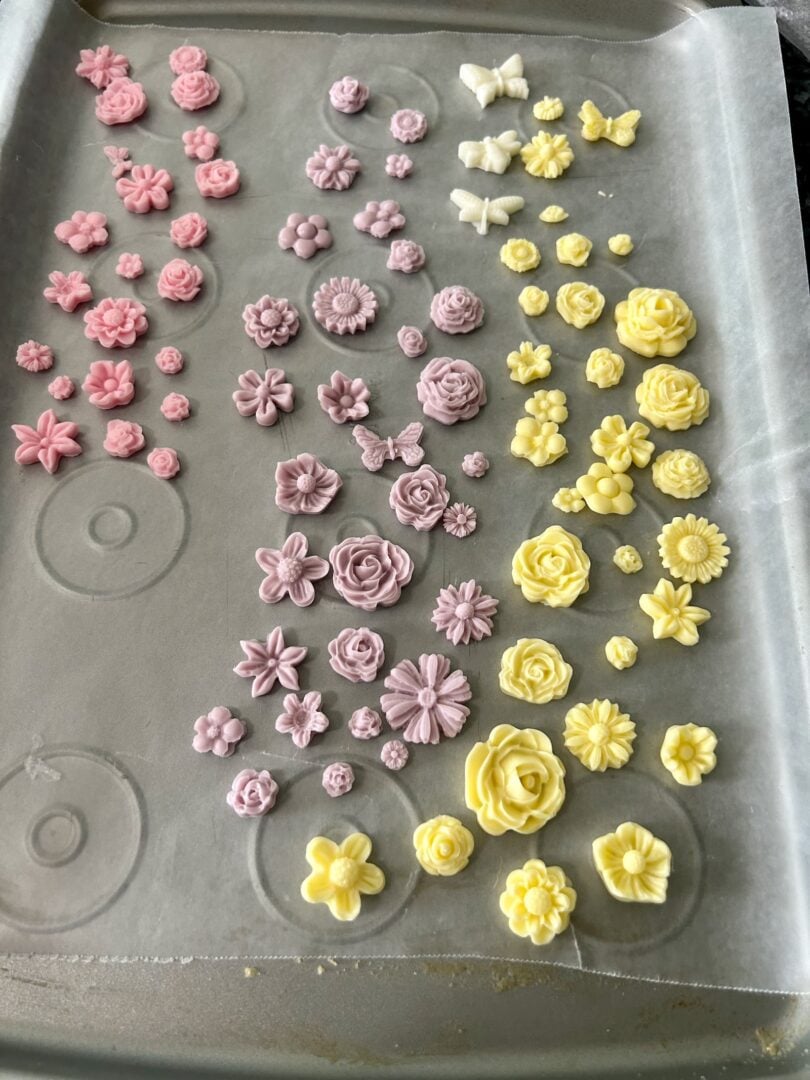
Within minutes I was piping colored almond bark into flower and butterfly molds. After a quick chill in the refrigerator, I had dozens of beautiful edible decorations ready to use on cakes, cupcakes, petit fours, cake pops, chocolate-covered treats, and more.
Best of all, they taste far better than fondant and require almost no decorating experience.
Why You'll Love This Technique
- Easier than working with fondant
- Uses leftover almond bark or candy melts
- Creates detailed flowers and butterflies in minutes
- Perfect for beginners
- Can be made ahead of time
- Tastes delicious
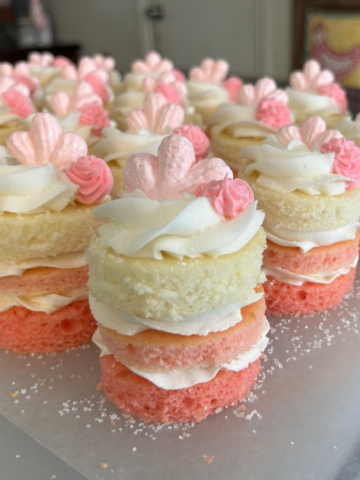
- Great for cakes, cupcakes, cake pops, petit fours, Oreos, pretzels, and marshmallows
What You'll Need
- White almond bark or candy melts
- Oil-based candy coloring or candy coloring powders
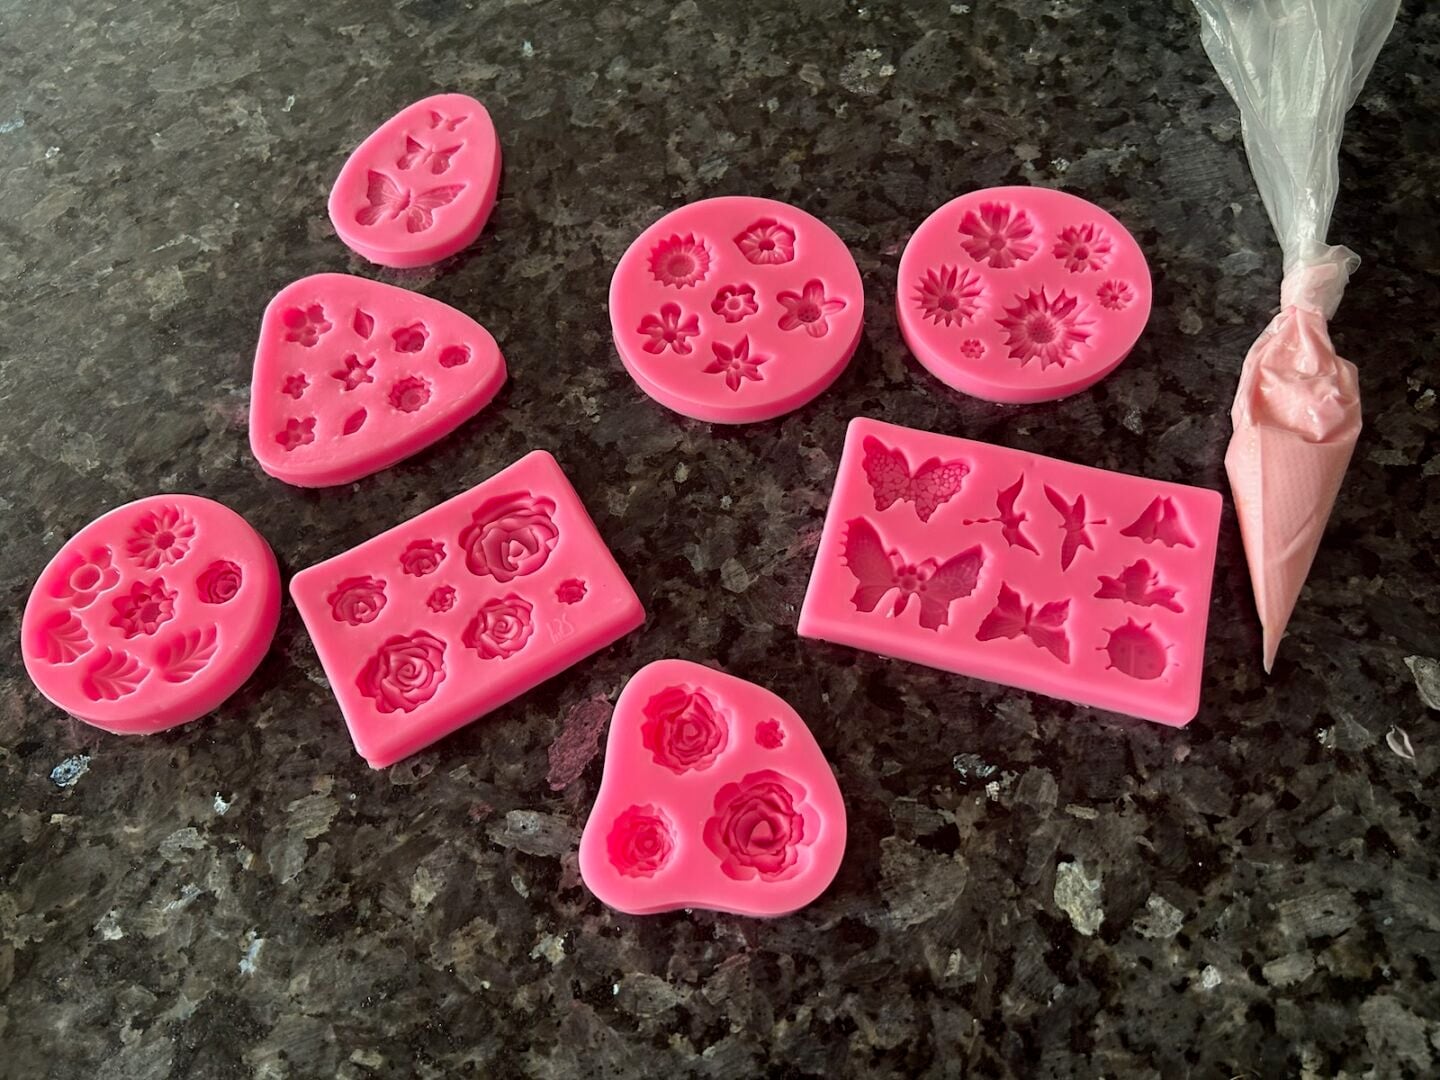
- Silicone fondant molds
- Disposable piping bags
- Small tray or baking sheet
- Refrigerator
How to Make Chocolate Flowers
Step 1: Melt the Almond Bark

Melt almond bark according to package directions. Divide into separate bowls if you'd like multiple colors.
Tint the melted almond bark with candy coloring until you achieve your desired shades.
Transfer each color to a disposable piping bag.
Step 2: Fill the Molds
Place your silicone molds on a small tray or baking sheet for easy transport.
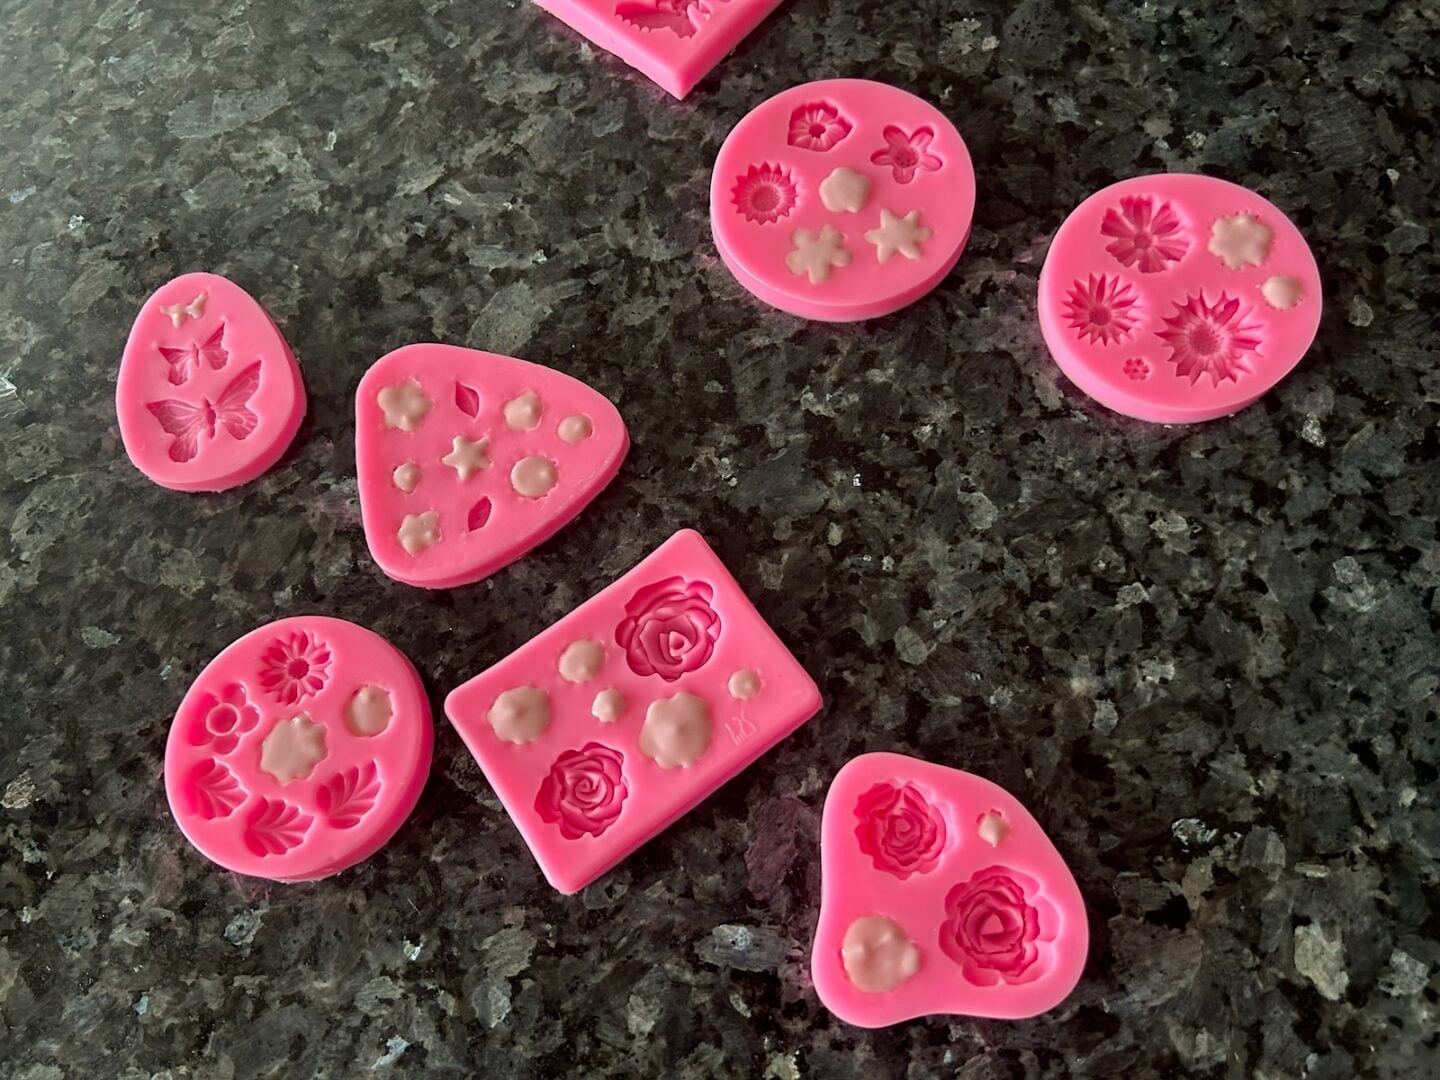
Pipe the melted almond bark directly into each cavity, making sure to fill all of the details.
Gently tap the mold against the counter to remove air bubbles and help the chocolate settle into the design.
Step 3: Chill Until Firm
Place the tray in the refrigerator.
Depending on the size of the mold, the decorations may need 15–20 minutes to fully set.
Larger flowers may require a bit longer.
Step 4: Remove from the Molds
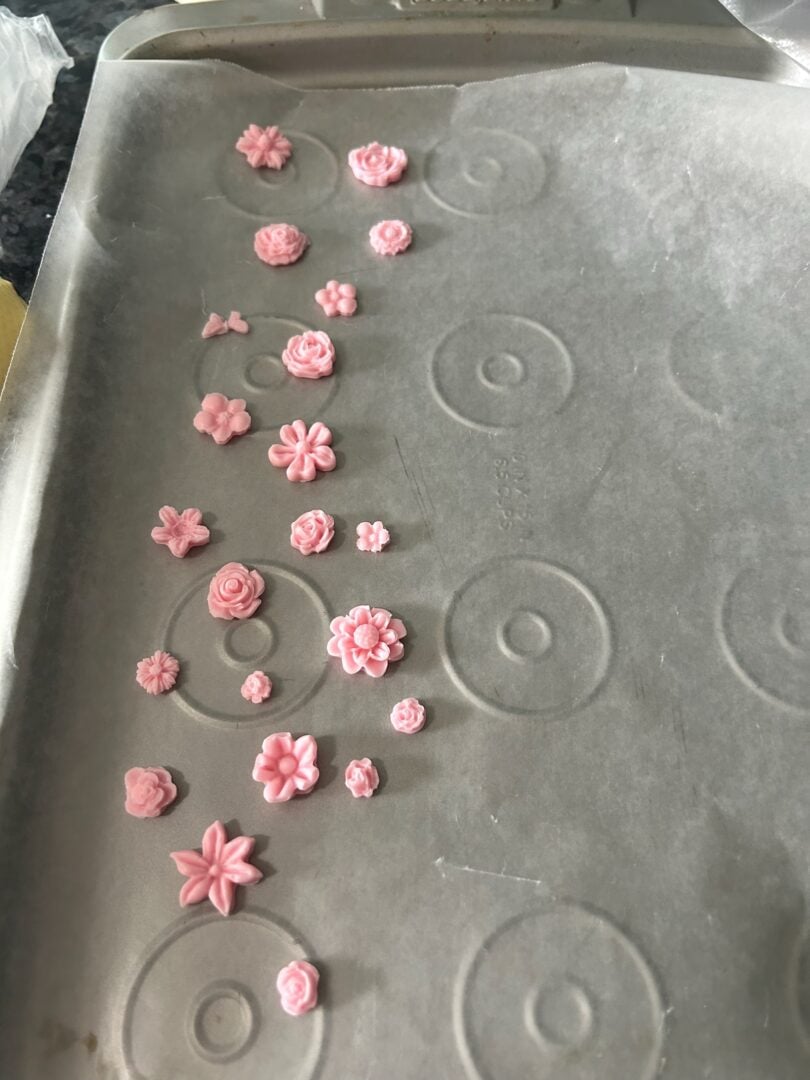
Once completely firm, gently flex the silicone mold and pop the decorations out.
If a flower seems soft, return it to the refrigerator for a few more minutes before attempting to remove it.
Step 5: Decorate Your Desserts
Use the flowers and butterflies immediately or save them for later.
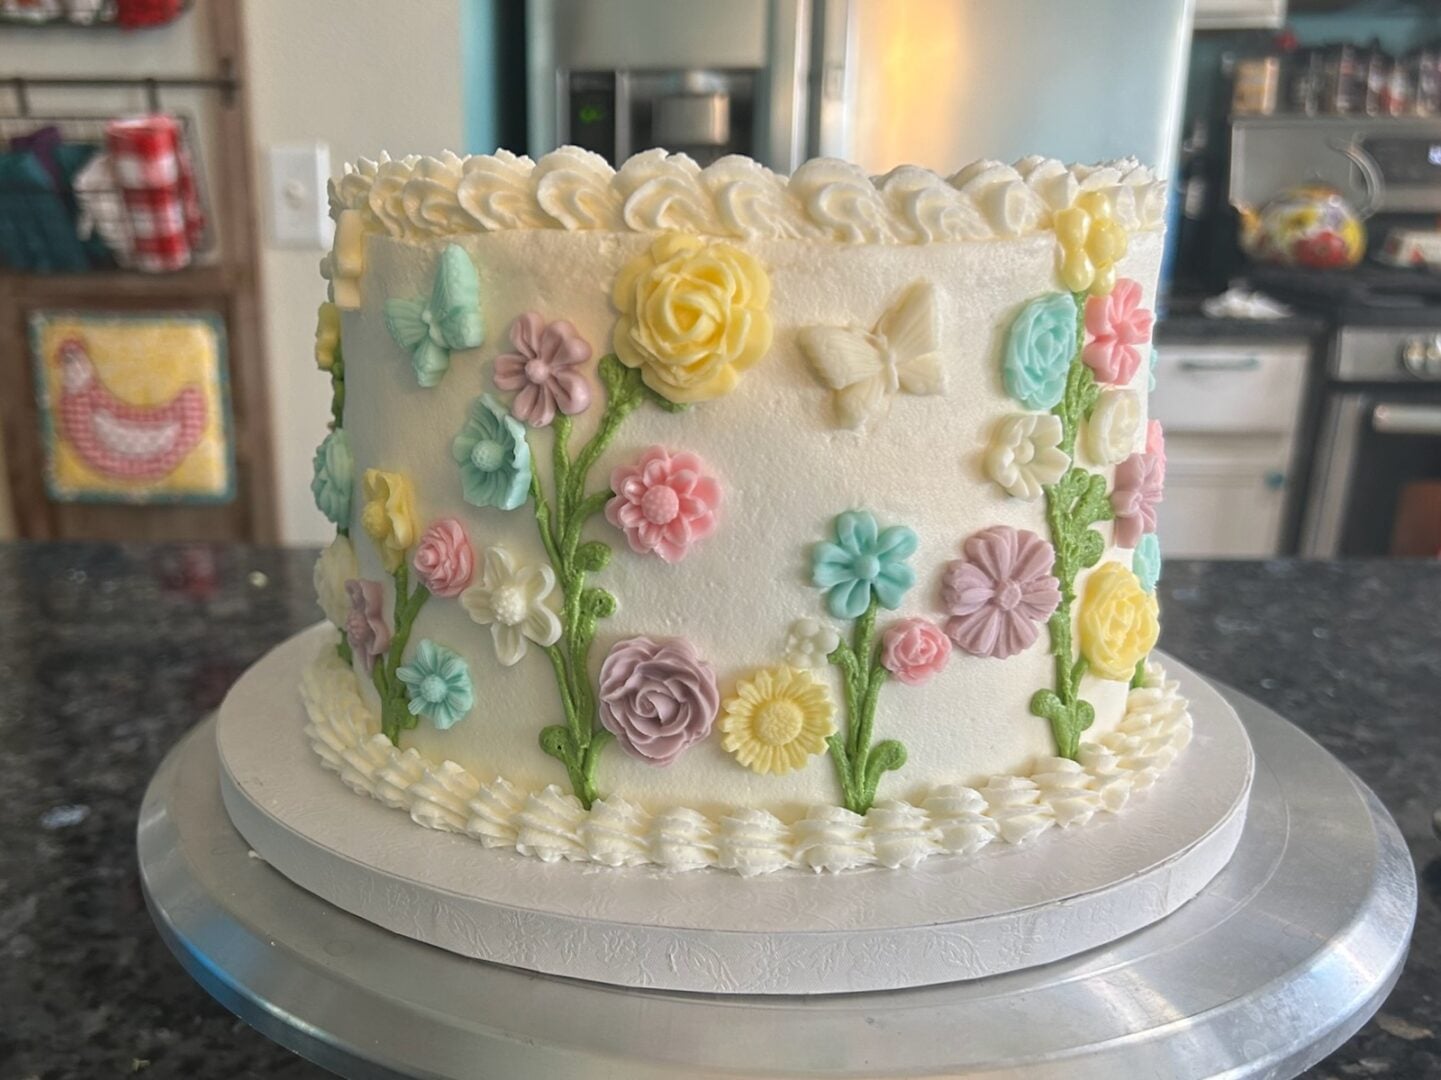
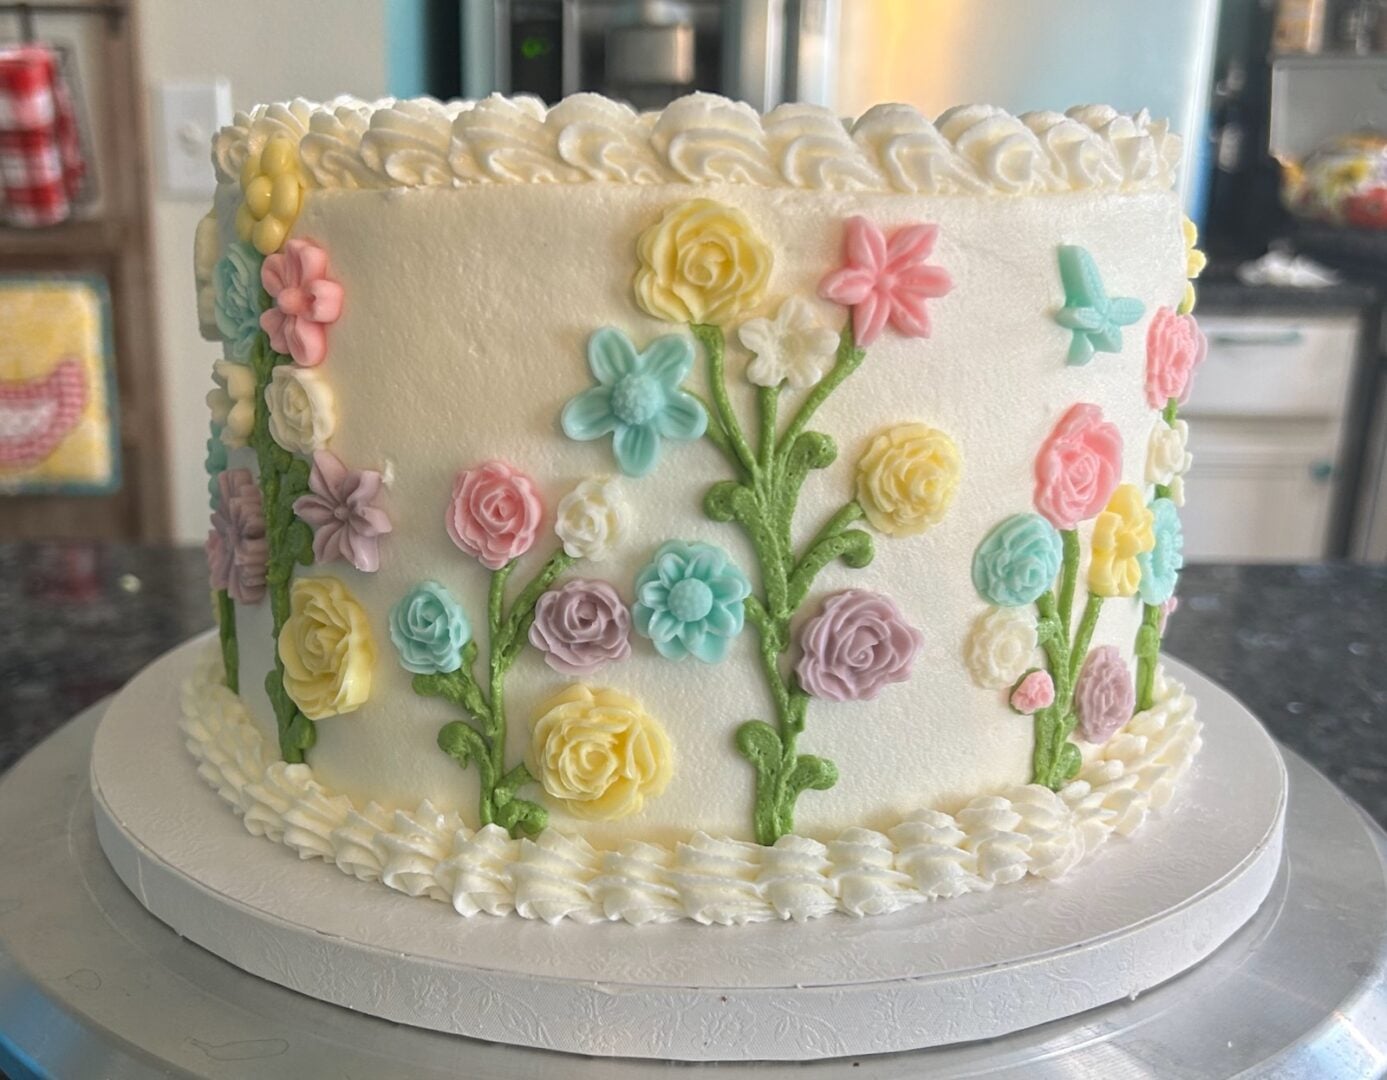
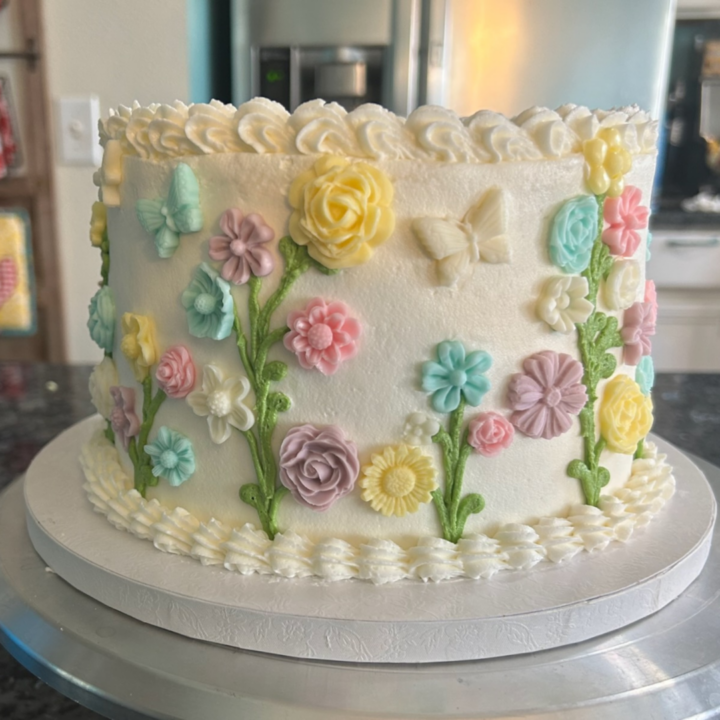
I attached mine to a birthday cake decorated with marshmallow buttercream and piped green stems. The flowers adhered beautifully to the frosting and created a whimsical garden effect.
Decorating Ideas
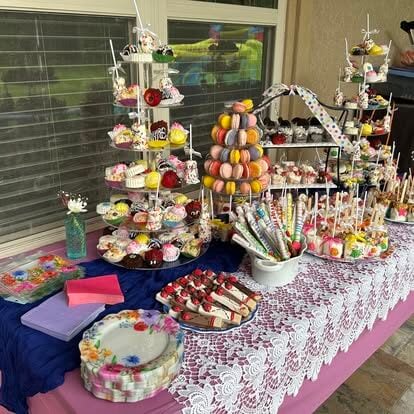
These chocolate decorations are perfect for:
- Birthday cakes
- Wedding cakes
- Baby shower desserts
- Tea party treats
- Cupcakes
- Cake pops
- Petit fours
- Chocolate-covered Oreos
- Chocolate-covered pretzels
- Chocolate-covered marshmallows
- Cheesecake bites
- Mini desserts
Storage Tips
Store finished chocolate flowers in an airtight container in a cool, dark location.
Separate layers with parchment paper to prevent breakage.
For longer storage, place them in an airtight container in the freezer. Allow them to come to room temperature before using.
Frequently Asked Questions
Absolutely. Candy melts should work just as well in silicone molds.
Use candy coloring designed for chocolate products. Traditional gel coloring can cause melted almond bark or chocolate to seize.
When stored properly in a cool, dry location, they should keep for several weeks.
Yes. Store them in an airtight container with parchment paper between layers.
Yes. Mine adhered beautifully to freshly frosted buttercream.
Absolutely. A single flower can instantly elevate a simple cupcake.
Yes. This is one of my favorite things about this technique. Make a batch whenever you have leftover almond bark and keep them on hand for future projects.
Definitely. Any silicone fondant mold should work.
In my opinion, yes! They're essentially flavored candy decorations, making them far more enjoyable to eat than traditional fondant accents.
Final Thoughts
Sometimes the best baking discoveries happen completely by accident.
What started as an effort to use up leftover almond bark turned into one of my favorite decorating techniques. These simple chocolate flowers are beautiful, easy to make, and incredibly versatile.
I have a feeling I'll be keeping a stash of them on hand from now on.
Thanks for Stopping By!
If you make these chocolate flowers and enjoy them, please let me know in the comments. And before you go, why not pin some photos to your Pinterest boards?


Janice Thompson is a professional baker, cake designer, and author with over 20 years of experience creating unique cakes and desserts. She’s the creator of Out of the Box Baking, where she shares her favorite doctored cake mix recipes, tutorials, and baking tips. Learn more →
How to Make Chocolate Flowers Using a Silicone Mold
Create beautiful edible chocolate flowers and butterflies using almond bark and silicone fondant molds. These easy decorations are perfect for cakes, cupcakes, cake pops, petit fours, and more.
Materials
- White almond bark or candy melts
- Oil-based candy coloring (optional)
Tools
- Silicone fondant molds
- Microwave-safe bowls
- Disposable piping bags
- Small tray or baking sheet
- Refrigerator
Instructions
1. Melt the almond bark.
Melt white almond bark according to the package directions. Divide into bowls and tint with candy coloring if desired.
2. Fill the piping bags.
Transfer each color to a disposable piping bag and snip a small opening.
3. Pipe into the molds.
Place the silicone molds on a small tray. Pipe the melted almond bark into each cavity, making sure to fill all of the details. Gently tap the molds on the counter to release any air bubbles.
4. Chill until firm.
Refrigerate the molds for 15–20 minutes, or until the chocolate is completely set.
5. Remove the decorations.
Gently flex the silicone molds to release the flowers and butterflies. If they seem soft, return them to the refrigerator for a few more minutes.
6. Decorate your desserts.
Press the flowers into freshly frosted cakes, cupcakes, cake pops, petit fours, or other treats. Add a small dab of buttercream if needed for larger decorations.
Notes
Use candy coloring designed for chocolate products.
If the almond bark begins to thicken, microwave the piping bag in short 10–15 second bursts until it becomes fluid again.
Keep the molds on a tray for easy transport to and from the refrigerator.
Store finished decorations in an airtight container in a cool, dark place until ready to use.
Don't rush the unmolding process. Let the decorations chill until they're completely firm before removing them from the molds. I found that about 20 minutes produced the cleanest results with almost no breakage.