Simple French Country Bread (Artisan Sourdough)
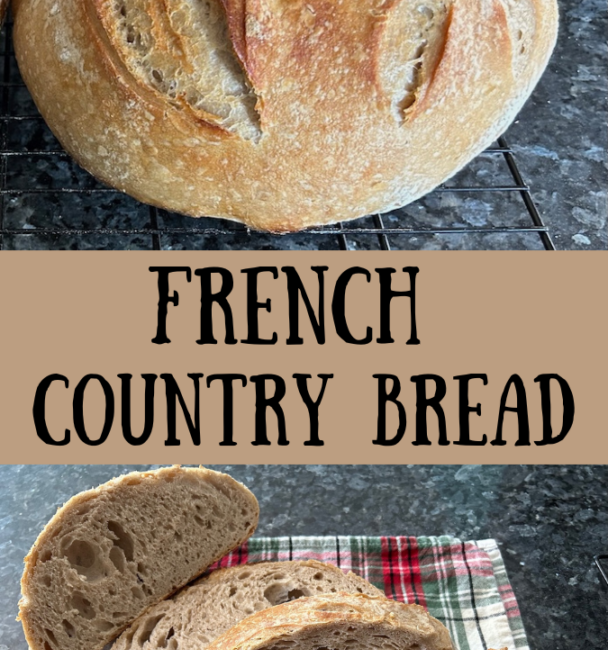
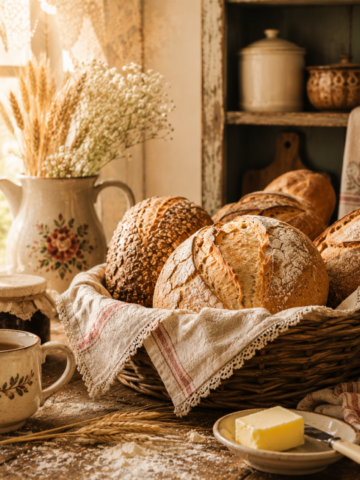
This Simple French Country Bread is a classic artisan sourdough loaf with a crisp, golden crust and a soft, airy crumb. Made with just a few ingredients and a sourdough starter, it’s a beautiful rustic bread perfect for slicing, toasting, or serving alongside any meal!

At a Glance: Simple French Country Bread
👩🍳 Skill Level: Intermediate
🥄 Flavor Profile: Mildly tangy with a crisp crust and soft, airy interior
🧁 Options Included: Traditional round boule or freeform rustic loaf
🎯 Best For: Artisan bread lovers, dinner sides, toasting, or farmhouse-style meals
What is Country Bread?

As you might imagine, a “country” bread is a rustic, simplistic loaf that folks of any income or station could make in their own home. In many ways, this particular loaf is similar to my Homemade Sourdough Bread, but with the addition of an ingredient not found in that recipe: wheat flour.
What is the Difference between Wheat Flour and White Flour?
The primary difference between wheat flour and white flour lies in how much of the wheat grain is used during processing. Wheat flour (which is often labeled whole wheat flour) is made from the entire grain. This includes the bran, germ, and endosperm, which makes it higher in fiber and nutrients (win!). It also gives the bread a denser texture and nuttier flavor.
White flour is usually refined to include only the endosperm, resulting in a lighter color, finer texture, and milder flavor. It also removes much of the natural fiber and nutrients found in the whole grain.
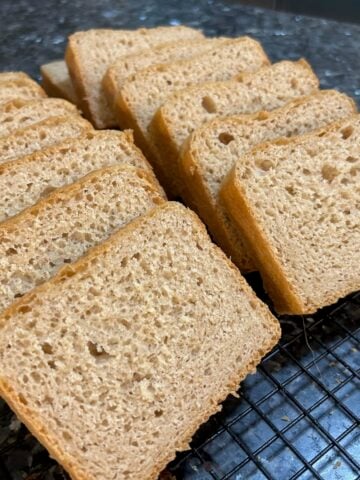
This particular bread calls for 4 parts white flour to 1 part wheat flour. So, the texture is still light, (like a white flour recipe) but with more structure, fiber, and nutrients.
All that to say. . .
It’s a winning recipe, not just for country folks, but for those of us who live in the city or suburbs!
I happened to have some active start on hand after making my Same Day Sourdough bread and my Cranberry Pecan Bread. I could have discarded it, of course (trust me, I make a lot of recipes with my discard: biscuits, pizza dough, and dinner rolls, to name a few). But in this case I was in the mood to try something different. So, I decided to make this recipes, which I found in the Tartine Bread cookbook.
(Side note: If you don’t have that book, you’re missing out!)
Country Bread Ingredients

You will find a full printable recipe card at the bottom of this post but here’s a quick peek at what you’ll need to make this sourdough. These are simple ingredients you probably already have in your kitchen.
- 100g starter (½ cup)
- 350g water (1 ½ cups)
- 400g all purpose flour (3 ¼ cups, loosely scooped and leveled)
- 100g whole wheat flour (¾ cup + 1 tablespoon, loosely scooped and leveled)
- 10g salt (1 ¾ teaspoons)
That’s it! Just a few simple ingredients!
Disclaimer: This recipe was originally developed using weight measurements for accuracy. Flour can vary greatly depending on how it's scooped (packed vs. loose), and sourdough starter densities can differ. For best results, use a digital kitchen scale. Cup conversions are provided for convenience but may affect texture and hydration.
How to Make Simple French Country Bread
As with more sourdoughs, this is a two-day process. You’ll want to start with an active starter. Once you have that ready to go, this is how you’ll make this delicious country loaf. I’m going to include a sample schedule for this country bread recipe. You can easily adapt it to meet your needs.
DAY ONE:
8:00 AM

Start the day by feeding your starter using the 1:1:1 method (equal portions starter, room temperature water, and flour).
Example: 200 grams of starter, 200 grams of water, 200 grams of flour
Let the starter sit for 4 hours until it doubles in size and turns bubbly.
12:00 PM
Check your starter to make sure it’s ready to go. Drop a pinch in some water. If it floats, you’re good to go!
You will need a kitchen scale for this next part and a large bowl. I use an 8-cup glass pyrex, but you can choose whatever you like.
Measure 350 grams of room temperature water into your mixing bowl.
Add 100 grams of your activated starter and whisk well using the bread whisk. (Make sure there are no lumps.)

Add 400 grams of all purpose flour to the bowl.
Add 100 grams of whole wheat flour.

Add 10 grams of salt.
Use the bread whisk to create a shaggy dough. It’s going to be sticky, but that’s what you want.

Use the bowl scraper to pull the excess dough away from the edges of the bowl.
I use a “tuck and fold” method to scrape the edges and pull the dough toward the center of the bowl, making sure I go around the whole bowl.
Cover the bowl and set aside for one hour in a warm (72 - 75 degree) spot. You can use the oven (turned off, of course) with the light on. But, really, any place will do.
1:00 PM
Perform your first round of stretch and folds. This is a simple process. Just wet your hands, reach down into the bowl and pull up the dough as far as you can, and fold it over to center and press down. Rotate the bowl a quarter turn and repeat. Keep turning until you’ve stretched and folded all of the dough. It will tighten up as you go along, but that’s perfectly natural.
Loosely cover and set aside.
1:30 PM
Perform your second set of stretch and folds.
2:00 PM
Perform your third set of stretch and folds.
2:30 PM
Perform your fourth/final set of stretch and folds.
Cover dough and leave it proof for 4-5 hours (no longer than five hours)

7:00 PM
Now that the dough has proofed it’s time to shape it into a rustic artisan loaf, also known as a boule (a ball).
We all have our own methods for this, but I tend to stretch my dough in a rectangle, then fold it envelope style. Then I work it into a circular loaf by pushing and pulling the dough to create tension. Be sure to pinch the loose bits together with your fingers.


7:15 PM
Lightly flour your Banneton bowl. Set the loaf inside, seam side up. Cover with tea towel or cheesecloth and set in refrigerator.

DAY TWO:
8:00 AM
Place empty dutch oven (with lid) in oven and set temperature at 500 degrees Fahrenheit. Leave in oven for a full hour. (Make sure your dutch oven can withstand this temperature. Not all Dutch ovens are equal.)
9:00 AM
Lower the oven temperature to 450 degrees Fahrenheit.
Remove banneton from refrigerator.

Crumple a piece of parchment paper and place it on top of the bowl.
Flip the dough ball out onto the wrinkled paper. Don't worry if it looks a bit flat. Hopefully it will rise during the first 20 minutes of the bake. (This is known as an oven spring.)

Use the lame to score the dough. A slight curve is all that’s necessary but you can get fancy if you like. Cut down about half an inch.

Using a hot pad remove the lid from the dutch oven (still in the oven), being careful not to burn yourself.
Use the parchment paper to gently set the dough ball into the pan.

Drop four ice cubes into the dutch oven under the edges of the parchment paper.
Put the lid back on and close the oven door.
Bake for 20 minutes.
Remove the lid and check your oven spring. Whew! Hopefully it has risen beautifully!)
Bake for another 20 minutes.
Your bread is now ready!

Remove the dutch oven from the oven and set on a wire rack to cool.
After a few minutes, remove the dough (and parchment paper) from the dutch oven.

Allow to cool for at least an hour, or longer. I recommend an hour and a half. I enjoy checking the bottom of the loaf at this point. (You can thump it! It sounds like a drum!)
Slice the bread with a sharp bread knife.

Serve and enjoy.

Store at room temperature in a bread bag or a basket with tea towel on top. It will stay fresh for 2-3 days.
What to Expect from this Recipe

While slightly darker in color than my Homemade sourdough bread, this loaf was very reminiscent of that one. The addition of the whole wheat flour added a smidgeon to the density, but I wouldn’t call this a heavy bread. It’s got a lot of texture and tastes great.
Variations on this Recipe
This is so delicious just as it is, but you could add to it, no problem! (Inclusions are delicious)
Herbs and garlic:Give it a European twist with herbs (or sun-dried tomatoes) and a bit of garlic. Yum.
Spanish flair: Add chopped cheddar (cubed) and a diced jalapeño or chili pepper for a Mexican twist
Cinnamon Swirl: If you like my Cinnamon Swirl recipe you can use that same method with this recipe.
Other Breads from Out of the Box Baking
If you love this loaf you’re sure to love my other bread recipes:
- Cheesecake Factory Honey Brown Bread
- Cranberry Pistachio Bread
- Daves Killer Bread
- Rustic Artisan Bread
- Easy Italian Herb Bread
That’s it for this post, friends!
I hope you enjoyed this delicious recipe.
If you make this recipe and love it, don’t forget to leave a review and a comment below. And while you're at it, go ahead and pin some photos to your Pinterest boards!


Loved this recipe? Get more like it straight to your inbox. Sign up for our newsletter now!
About the Author
Janice Thompson is an author, baker, and all-around mischief maker! She has overcome a host of baking catastrophes, including a toppled wedding cake, to learn more about the baking process. Janice has published over 165 books for the Christian market but particularly enjoys writing recipes and baking devotions. To learn more about Janice or to drop her a note, visit her About the Author page.

French Country Bread
This Simple French Country Bread is a classic artisan sourdough loaf with a crisp, golden crust and a soft, airy crumb. Made with just a few ingredients and a sourdough starter, it’s a beautiful rustic bread perfect for slicing, toasting, or serving alongside any meal!
Ingredients
- 100g starter (½ cup)
- 350g water (1 ½ cups)
- 400g all purpose flour (3 ¼ cups, loosely scooped and leveled)
- 100g whole wheat flour (¾ cup + 1 tablespoon, loosely scooped and leveled)
- 10g salt (1 ¾ teaspoons)
Instructions
How to Make Simple French Country Bread
As with more sourdoughs, this is a two-day process. You’ll want to start with an active starter. Once you have that ready to go, this is how you’ll make this delicious country loaf:
How to Make French Country Bread
I’m going to include a sample schedule for this country bread recipe. You can easily adapt it to meet your needs.
DAY ONE:
8:00 AM
Start the day by feeding your starter using the 1:1:1 method (equal portions starter, room temperature water, and flour).
Example: 200 grams of starter, 200 grams of water, 200 grams of flour
Let the starter sit for 4 hours until it doubles in size and turns bubbly.
12:00 PM
Check your starter to make sure it’s ready to go. Drop a pinch in some water. If it floats, you’re good to go!
You will need a kitchen scale for this next part and a large bowl. I use an 8-cup glass pyrex, but you can choose whatever you like.
Measure 350 grams of room temperature water into your mixing bowl.
Add 100 grams of your activated starter and whisk well using the bread whisk. (Make sure there are no lumps.)
Add 400 grams of all purpose flour to the bowl.
Add 100 grams of whole wheat flour.
Add 10 grams of salt.
Use the bread whisk to create a shaggy dough. It’s going to be sticky, but that’s what you want.
Use the bowl scraper to pull the excess dough away from the edges of the bowl.
I use a “tuck and fold” method to scrape the edges and pull the dough toward the center of the bowl, making sure I go around the whole bowl.
Cover the bowl and set aside for one hour in a warm (72 - 75 degree) spot. You can use the oven (turned off, of course) with the light on. But, really, any place will do.
1:00 PM
Perform your first round of stretch and folds. This is a simple process. Just wet your hands, reach down into the bowl and pull up the dough as far as you can, and fold it over to center and press down. Rotate the bowl a quarter turn and repeat. Keep turning until you’ve stretched and folded all of the dough. It will tighten up as you go along, but that’s perfectly natural.
Loosely cover and set aside.
1:30 PM
Perform your second set of stretch and folds.
2:00 PM
Perform your third set of stretch and folds.
2:30 PM
Perform your fourth/final set of stretch and folds.
Cover dough and leave it proof for 4-5 hours (no longer than five hours)
7:00 PM
Now that the dough has proofed it’s time to shape it into a rustic loaf. We all have our own methods for this, but I tend to stretch my dough in a rectangle, then fold it envelope style. Then I work it into a circular loaf. Be sure to pinch the loose bits together with your fingers.
7:15 PM
Lightly flour your Banneton bowl. Set the loaf inside, seam side up. Cover with tea towel or cheesecloth and set in refrigerator.
DAY TWO:
8:00 AM
Place empty dutch oven (with lid) in oven and set temperature at 500 degrees Fahrenheit. Leave in oven for a full hour. (Make sure your dutch oven can withstand this temperature. Not all Dutch ovens are equal.)
9:00 AM
Lower the oven temperature to 450 degrees Fahrenheit.
Remove banneton from refrigerator.
Crumple a piece of parchment paper and place it on top of the bowl.
Flip the dough ball out onto the wrinkled paper.
Use the lame to score the dough. A slight curve is all that’s necessary but you can get fancy if you like. Cut down about half an inch.
Using a hot pad remove the lid from the dutch oven (still in the oven), being careful not to burn yourself.
Use the parchment paper to gently set the dough ball into the pan.
Drop four ice cubes into the dutch oven under the edges of the parchment paper.
Put the lid back on and close the oven door.
Bake for 20 minutes.
Remove the lid and bake for another 20 minutes.
Your bread is now ready!
Remove the dutch oven from the oven and set on a wire rack to cool.
After a few minutes, remove the dough (and parchment paper) from the dutch oven.
Allow to cool for at least an hour, or longer. I recommend an hour and a half. I enjoy checking the bottom of the loaf at this point. (You can thump it! It sounds like a drum!)
Slice the bread with a sharp bread knife.
Serve and enjoy.
Store at room temperature in a bread bag or a basket with tea towel on top. It will stay fresh for 2-3 days.
Notes
Disclaimer: This recipe was originally developed using weight measurements for accuracy. Flour can vary greatly depending on how it's scooped (packed vs. loose), and sourdough starter densities can differ. For best results, use a digital kitchen scale. Cup conversions are provided for convenience but may affect texture and hydration.
Nutrition Information:
Yield: 12 Serving Size: 1Amount Per Serving: Calories: 150Total Fat: 1gSaturated Fat: 0gTrans Fat: 0gUnsaturated Fat: 0gCholesterol: 0mgSodium: 325mgCarbohydrates: 31gFiber: 2gSugar: 0gProtein: 5g
The nutrition information is a product of online calculators. I try to provide true and accurate information, but these numbers are estimates.