
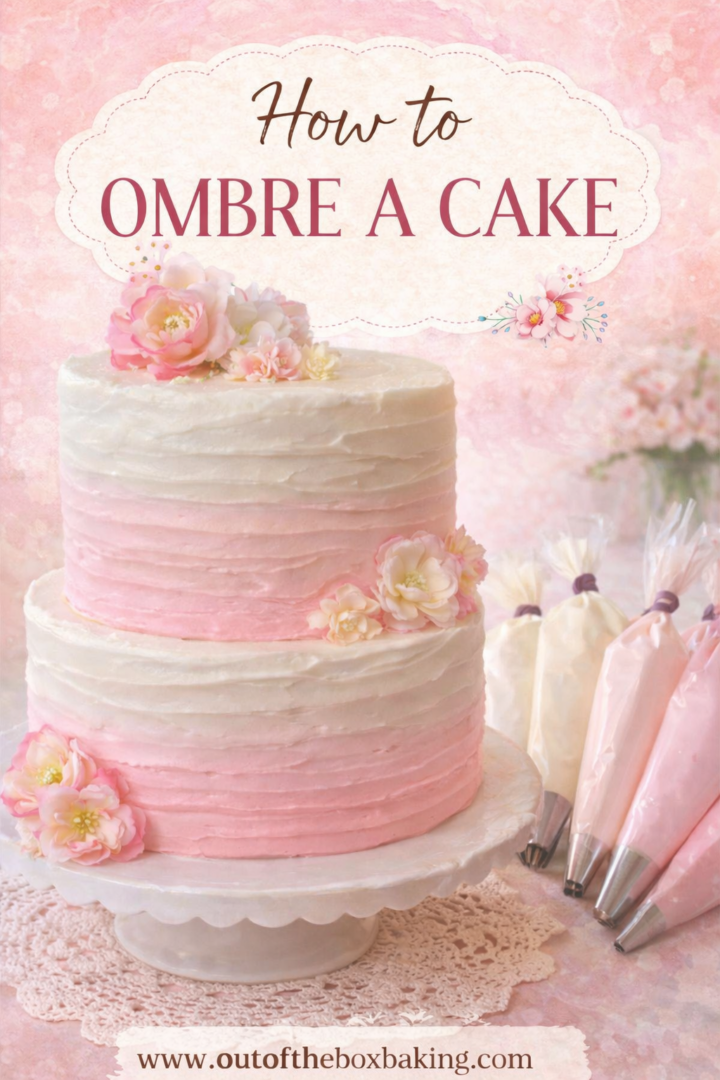
Easy Ombre Cake Tutorial (Perfect for Beginners!)

Ombre cakes are all the rage! A favorite with the girls is what I call the "Pretty in Pink" ombre cake, which I just adore! Let's look at a couple of different variations on pink ombre.


She's Pretty in Pink!
It’s girly, it’s elegant, and it can be dressed up or down with just a few changes in decoration. You can take this idea and change up the colors, the fillings, or even the flavors of the cake, but you’ll always end up with something the guests will ooh and aah over!
By the way, you're going to love this easy cake recipe! For more options, see my post titled How to Doctor a Boxed Cake Mix! I've also added a post titled Jazz up a Boxed Cake Mix: 12 Easy Hacks.
Here are some other helpful recipes to consider before learning the ombre technique:
- 80 Boxed Cake Mix Recipes
- 20 Amazing Recipes that Start with a White Cake Mix
- The Most Delicious White Cake from a Box
These recipes are terrific options!
So, let’s dive in, folks! You’ll look pretty in pink once this little number is ready to go!

Pink Ombre Cake Ingredients
You'll find a printable recipe card at the bottom of this post, but take a quick glance at what you'll need. You've probably already got most of these things on hand.
- 2 white cake mixes (Pillsbury or other)
- 8 egg whites
- 1 cup vegetable oil
- 2 cups water (can substitute milk for one of them)
- 1 teaspoon almond extract
- 1 teaspoon clear vanilla extract
- Pink coloring gel (I use Americolor)
Frosting:
- 1 cup butter (salted)
- 1 block (8-ounce) cream cheese
- 1 cup Crisco
- 7-8 cups powdered sugar
- Almond extract
- Clear vanilla extract
- Pink coloring gel
Filling:
- Strawberry preserves (stirred well)
Topping:
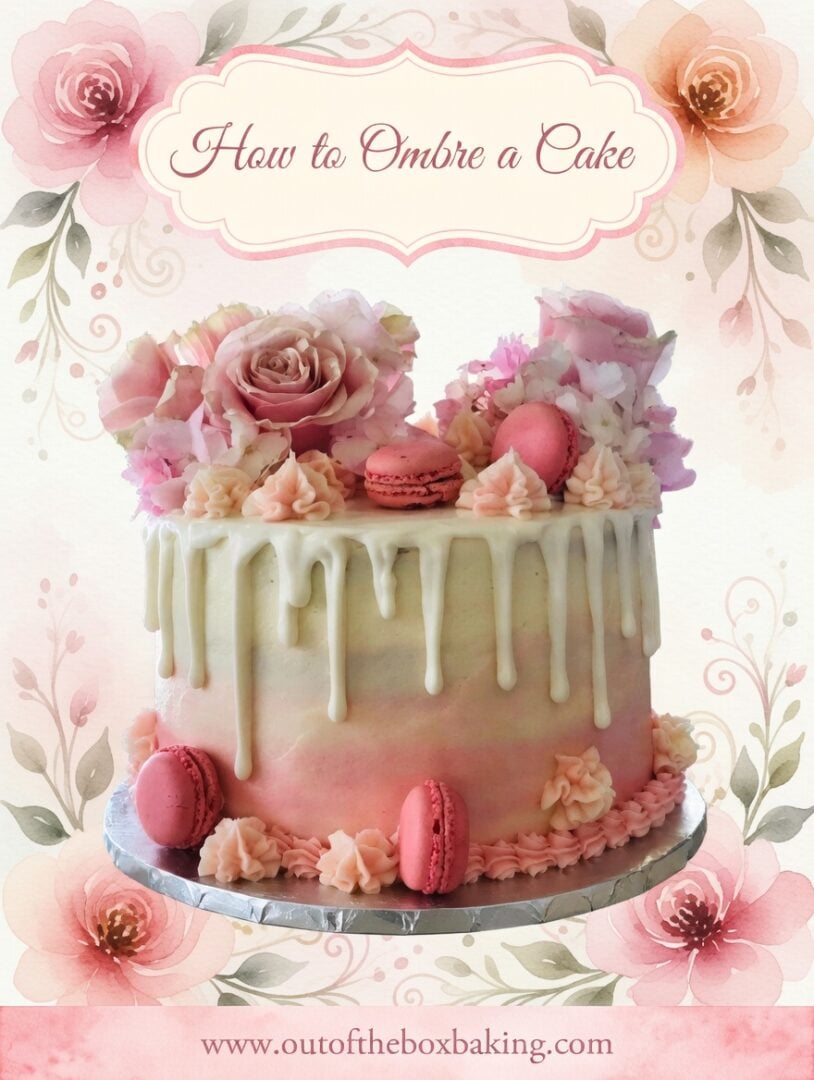
- Pink ganache drip
- Macaroons or other pink cookies
- Flowers (silk or fondant)
- Buttercream flowers (1M & Russian Piping Tip)
- Sprinkles
How to Make an Ombre Cake
Let's Make the Cake!
Combine all ingredients and mix well. Divide batter in half. Add a couple of drops of pink gel food coloring to one bowl of batter. Leave the other white.

Grease and flour four 7” round baking pans. (If you’re working with 8” pans, only use three.) Layer batter into baking pans one large scoop on top of the other (forming rings of batter in the alternating colors).

Check out the rings of color, y'all!
Bake at 350 for 25 – 30 minutes. Cake should pull away from the edges of the pan. Remove from pans and cool until they reach room temperature. (Once they reach room temperature it’s best to chill them for half an hour in the fridge before leveling.)
Let's Make the Icing!
Bring ingredients to room temperature. Mix butter and cream cheese until soft and creamy. Add Crisco and continue to beat until incorporated. Add extracts and then lower the speed of your mixer to add powdered sugar (more or less to desired consistency).

Ombre Heaven!
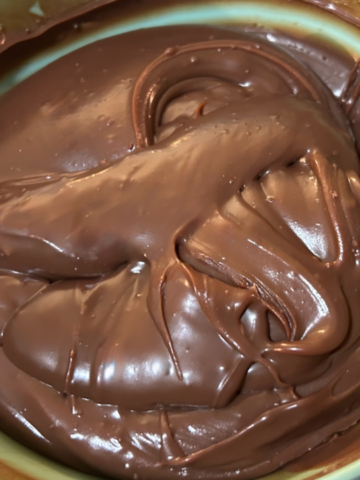
Drip:
You can use bottled drip or make your own using 2 parts white chocolate chips and 1 part heavy cream (in microwave until smooth and creamy). Cool before adding to cake.
Let's Assemble the Cake!
- Level cakes
- Place first cake layer on cake board.
- Ice the cake with buttercream.
- Using a piping bag, pipe a ring of frosting around the top of that cake.
- Scoop strawberry preserves into the center and smooth.
- Continue to stack cakes, filling the same way.
When Cakes are Stacked:
“Crumb coat” the cake with a thin layer of buttercream and put in the fridge for half an hour.
Icing the Cake:
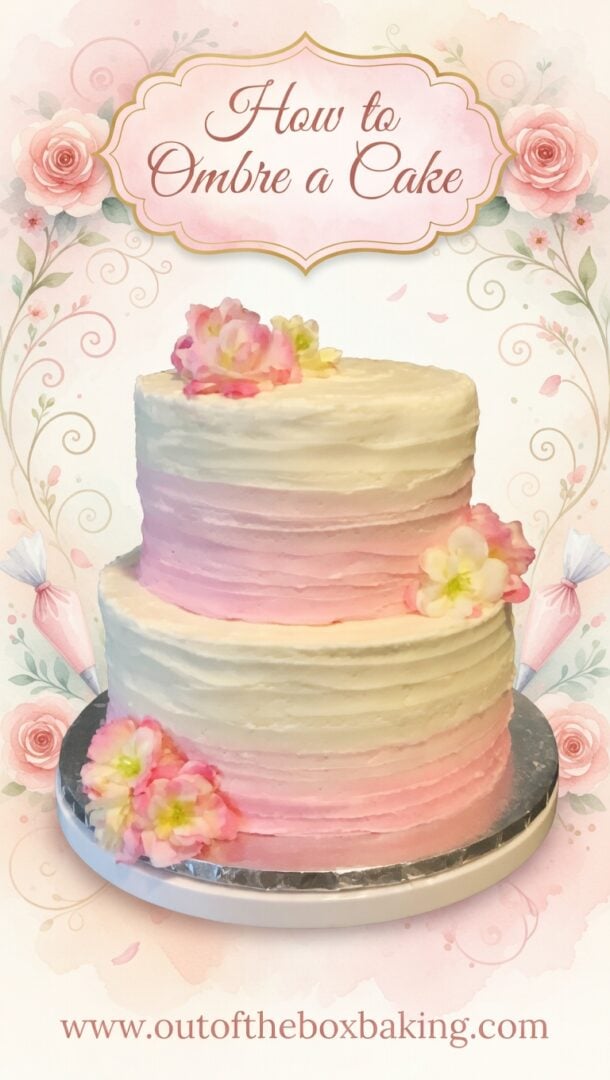
Divide your frosting and color it (using the same pink gel coloring you used inside the cake). Make three bowls/variations of pink (by adding a bit more gel as you go) and one bowl of white. Put frostings into piping bags and pipe rings around the cake (starting with darkest on bottom), ending with white on top. Smooth with bench scraper. (Your smoothing job doesn't have to be perfect!)
I found a great YouTube video from I Love Cakes, demonstrating this technique.
Topping the Cake:
Cake decorating is so fun! Use your imagination and have a blast!
Add drip to the top of the cake. There are multiple ways you could do this—either covering the top of the cake entirely, or just running it along the edge of the cake and letting it dribble down.

Decorating the Cake:
It’s time to add the fun stuff! Make sure the drip is completely cool before adding anything to the top of the cake, but get creative! Add rosettes, cookies, sprinkles, flowers, or fondant décor. You can use some of the techniques you'll find in my How to Decorate Valentine Heart Cookies post.
You can even tier an ombre cake, (see photos below). Be sure to add dowels or bubble tea straws for support if you do.


The end result? You’ll have a fancy little cake that will make your guests want to slap on a tu-tu and pirouette around the kitchen. Or maybe they’ll simply ask for another slice while you do all the dancing.
More Tips and Tricks from Out of the Box Baking
I've been on a roll, adding posts with (what I hope will be) helpful hacks for bakers. Here are a few of my favorites:
- 7 Popular Cupcake Decorating Techniques Using Wilton Tips: Cupcake decorating has come a long way in recent years, and it all comes down to having the right tip and knowing how to use it. In this practical tutorial I’m going to show you seven of my favorite decorating techniques using two Wilton tips–the 1M and the 6B. (complete with video tutorials)
- Become a Better Baker: You want to become a better baker, but haven’t had much luck. No worries! You’ve come to the right place! In this post I’m going to give you a dozen of my favorite baking hacks!
- Easy DIY Wedding Cake: Thinking about making a wedding cake, but not sure you can do it? Well, rest easy! I’m going to give you step-by-step instructions so that you can create this easy DIY wedding cake on your own, without involving a bakery! Best of all, you can bake it at home, in the comfort of your own kitchen.
And of course, my ultimate guide, as mentioned above. . .
- How to Doctor a Boxed Cake Mix: Are you one of those people who feels guilty for using a boxed cake mix? If so, you’ve come to the right place! In this post, which I’m labeling “The Ultimate Guide” to doctoring a boxed cake mix you’ll receive tips, tricks, and lots of fun ideas you’ve probably never thought of!
- Want your baked goods to look as amazing as they taste? I’ve got you covered.
👉 Visit the Cake & Cupcake Decorating Hub
Questions People are Asking
What is the best icing for ombre cake?
I would suggest my Decorator's Buttercream or my Dreamy Buttercream. You can use any meringue based icing, as well. I don't suggest using a traditional cream cheese frosting.
How do you smooth an ombre cake?
As mentioned above, start with a bench scraper. I've linked you to the one I use. Then you can come along behind it with an offset spatula if you like, to add texture.
Can I use completely different colors?
Absolutely! I love adding rings of color to my cakes. Check out a recent Astros cake I made. Go 'Stros!

What to Enjoy About This Easy Ombre Cake Technique
- Stunning visual impact. Ombre cakes look beautifully professional with a soft color gradient that’s sure to impress.
- Surprisingly simple. With a few bowls of tinted frosting and a basic spatula, you can create a bakery-worthy finish at home.
- Customizable colors. Match your ombre to any event — pastels for spring, bold tones for birthdays, or classic neutrals for elegance.
- Perfect for all skill levels. Whether you're a beginner or experienced baker, this technique is approachable and fun.
- Versatile and creative. Use buttercream, whipped frosting, or even tinted ganache — the ombre effect works with many styles.
- Great for celebrations. From birthdays to weddings to baby showers, ombre cakes are always a show-stopping centerpiece.
More Sweet Treats
There are so many delicious treats you might enjoy from Out of the Box Baking!
- If you like this cake, you'll love my Butter Pecan Cupcakes!
- I'm convinced you'll love my Old Fashioned Pound Cake with Whipping Cream, as well. (It's rare for me to bake a cake from scratch but this is one I'll make again and again!)
- The Best Chocolate Mayonnaise Cake (another scratch recipe, this one with mayonnaise!)
Looking for magical birthday inspiration? My Themed Birthday Parties for Girls post has plenty of sweet and colorful ideas.
While you're here, why not pin some pictures?
If this recipe made your day sweeter, let me know in the comments!
Janice Thompson writes novels, devotionals, and baking blog posts with equal enthusiasm. She’s been baking since she was knee-high to a mixing bowl and still learns something new with each recipe. Get to know her here.
Note: This post may contain affiliate links. This means that I make a very small commission off of items you purchase at absolutely no additional cost to you. Please check out my policy page for more information about this blog and the ads that run on it.
Follow me on social media!

How to Ombre a Cake
LIght, fluffy, pink, girlie. . .this luscious white cake with pink details is perfect for her special day.
Ingredients
- 2 white cake mixes (Pillsbury or other)
- 8 egg whites
- 1 cup vegetable oil
- 2 cups water (can substitute milk for one of them)
- 1 teaspoon almond extract
- 1 teaspoon clear vanilla extract
- 1 cup butter (salted)
- 1 8-ounce block cream cheese
- 1 cup Crisco
- 7-8 cups powdered sugar
- Almond extract
- Clear vanilla extract
- Strawberry preserves (stirred well)
- Pink ganache drip (bottled or homemade is fine)
Instructions
Cake
- Combine all ingredients and mix well.
- Divide batter in half. Add a couple of drops of pink gel food coloring to one bowl of batter. Leave the other white.
- Grease and flour four 7” round baking pans. (If you’re working with 8” pans, only use three.)
- Layer batter into baking pans one large scoop on top of the other (forming rings of batter in the alternating colors).
- Bake at 350 for 25 – 30 minutes. Cake should pull away from the edges of the pan.
- Remove from pans and cool until they reach room temperature. (Once they reach room temperature it’s best to chill them for half an hour in the fridge before leveling.)
Icing
- Bring ingredients to room temperature.
- Mix butter and cream cheese until soft and creamy.
- Add Crisco and continue to beat until incorporated.
- Add extracts and then lower the speed of your mixer to add powdered sugar (more or less to desired consistency).
Drip
I use bottled drip but you can make your own using 2 parts white chocolate chips and 1 part heavy cream (in microwave until smooth and creamy). Cool before adding to cake.
Assembling the Cake
- Level cakes
- Place first cake on cake board.
- Ice the cake with buttercream.
- Pipe a ring of frosting around the top of that cake.
- Scoop strawberry preserves into the center and smooth.
- Continue to stack cakes, filling the same way.
- Crumb coat with thin layer of buttercream.
- Divide your frosting and color it (using the same pink gel coloring you used inside the cake). Make three bowls/variations of pink (by adding a bit gel more as you go) and one bowl of white. Put frostings into piping bags and pipe rings around the cake (starting with darkest on bottom), ending with white on top. Smooth with bench scraper.
- Add drip to the top of the cake. There are multiple ways you could do this—either covering the top of the cake entirely, or just running it along the edge of the cake and letting it dribble down.
- It’s time to add the fun stuff! Make sure the drip is completely cool before adding anything to the top of the cake, but get creative! Add rosettes, cookies, sprinkles, flowers, or fondant décor.
Notes
The end result? You’ll have a fancy little cake that will make your guests want to slap on a tu-tu and pirouette around the kitchen. Or maybe they’ll simply ask for another slice while you do all the dancing.
"He will wipe away every tear from their eyes, and death shall be no more, neither shall there be mourning, nor crying, nor pain anymore, for the former things have passed away.”
Revelation 21:4

You mean I could actually be a cake baker? Great instructions!
This is a beautiful cake!! Everything on the blog looks so good!!!
Thank. you!!
This is one of the most beautiful cakes ever! I love the ombré look and now I can try it at home ??
Thank you so much!
I'm confused about your "block" of crisco. Since Crisco comes in a 3pound can, what is a block? And the cream cheese, is that 4 or 8 ounce block?
I buy Crisco in blocks (or "stick") like you see here: https://www.walmart.com/ip/Crisco-All-Vegetable-Shortening-Sticks-20-oz/724828844?classType=VARIANT&athbdg=L1100&from=/search A block/stick is one cup. If the recipe doesn't specify that, I'll correct it now. Thanks for letting me know!