
Easy Salted Caramel Chocolate Chip Cookie Cups

These easy salted caramel cookie cups pair soft chocolate chip cookies with gooey caramel, a caramel drizzle, and a delicate sprinkling of sea salt.

Two of my granddaughters are leaving for college this weekend, so I spent the evening making special treats for their going-away care packages.
I started with my Viral Reese’s Chocolate Chip Cookie Cups, using half of a 36-ounce tub of refrigerated Toll House cookie dough. Once those were finished, I realized I had enough dough left to make an entirely different flavor.
After spending the whole day cooking and baking for my food blogs—and while still recovering from being sick—I wasn’t about to start another complicated recipe.
Then I remembered the packages of Kraft caramels in my pantry. Chocolate chip cookie cups filled with warm, gooey caramel? Finished with a caramel drizzle and the tiniest sprinkling of sea salt? Yes, please!

Salted Caramel Cookie Cups at a Glance
- Skill level: Easy
- Cookie base: Refrigerated chocolate chip cookie dough
- Filling: Kraft caramels melted with heavy cream
- Pan: 24-cavity mini muffin pan
- Yield: 24 cookie cups
- Perfect for: Care packages, parties, bake sales, holiday trays, and homemade gifts
Ingredients
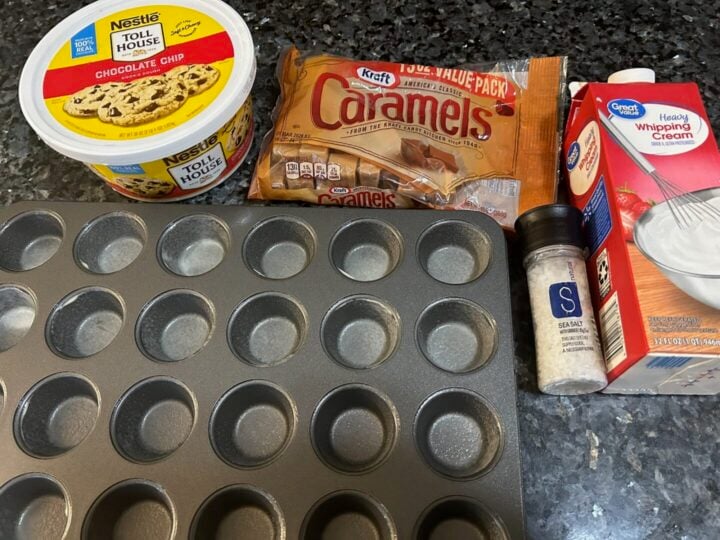
You will find exact amounts in the printable recipe card below, but here’s a quick look at what you’ll need:
- Refrigerated chocolate chip cookie dough
- Kraft caramels
- Heavy whipping cream
- Coarse sea salt
- Nonstick baking spray
I used the remaining half of a 36-ounce tub of Toll House chocolate chip cookie dough. This gave me enough dough for 24 mini cookie cups.
How to Make Salted Caramel Chocolate Chip Cookie Cups
These come together quickly, but make sure you allow enough time for the cookies and caramel to set before packaging them.
Prepare the Pan
Preheat your oven to 350°F.
Lightly spray a 24-cavity mini muffin pan with nonstick baking spray.
Portion the Dough
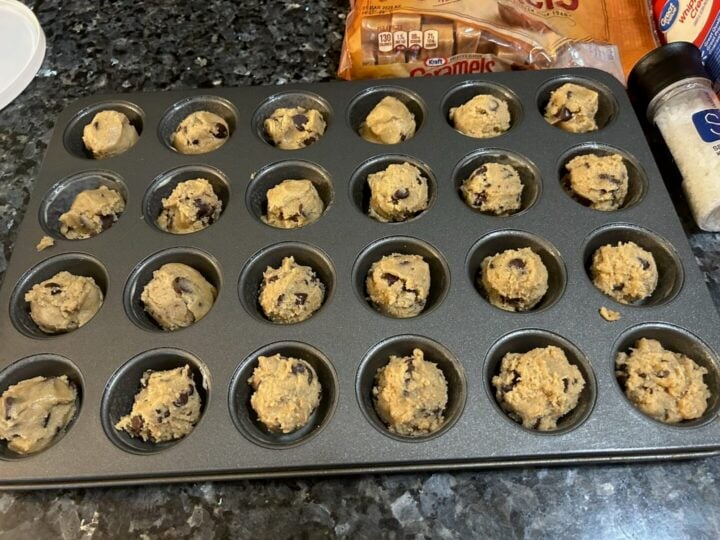
Place approximately 1 tablespoon of chocolate chip cookie dough into each mini muffin cavity.
If you’re using a scale, aim for about 18 grams of dough per cookie cup.
You don’t need to press the dough up the sides of the pan. Simply place a scoop or ball of dough into each cavity. The dough will spread as it bakes.
Bake the Cookie Cups
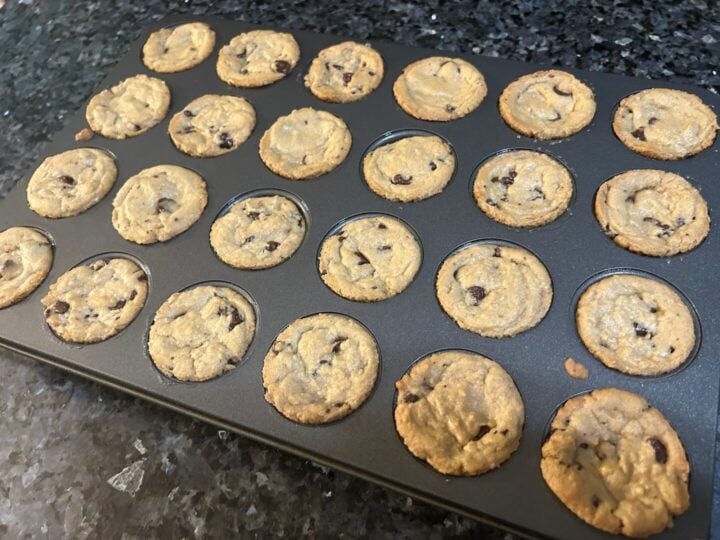
Bake for approximately 11–13 minutes, or until the edges are set and lightly golden.
The centers will still be soft, but they shouldn’t look wet or raw. Mine baked for approximately 12 minutes because the dough was still partially chilled.
Make the Caramel Filling
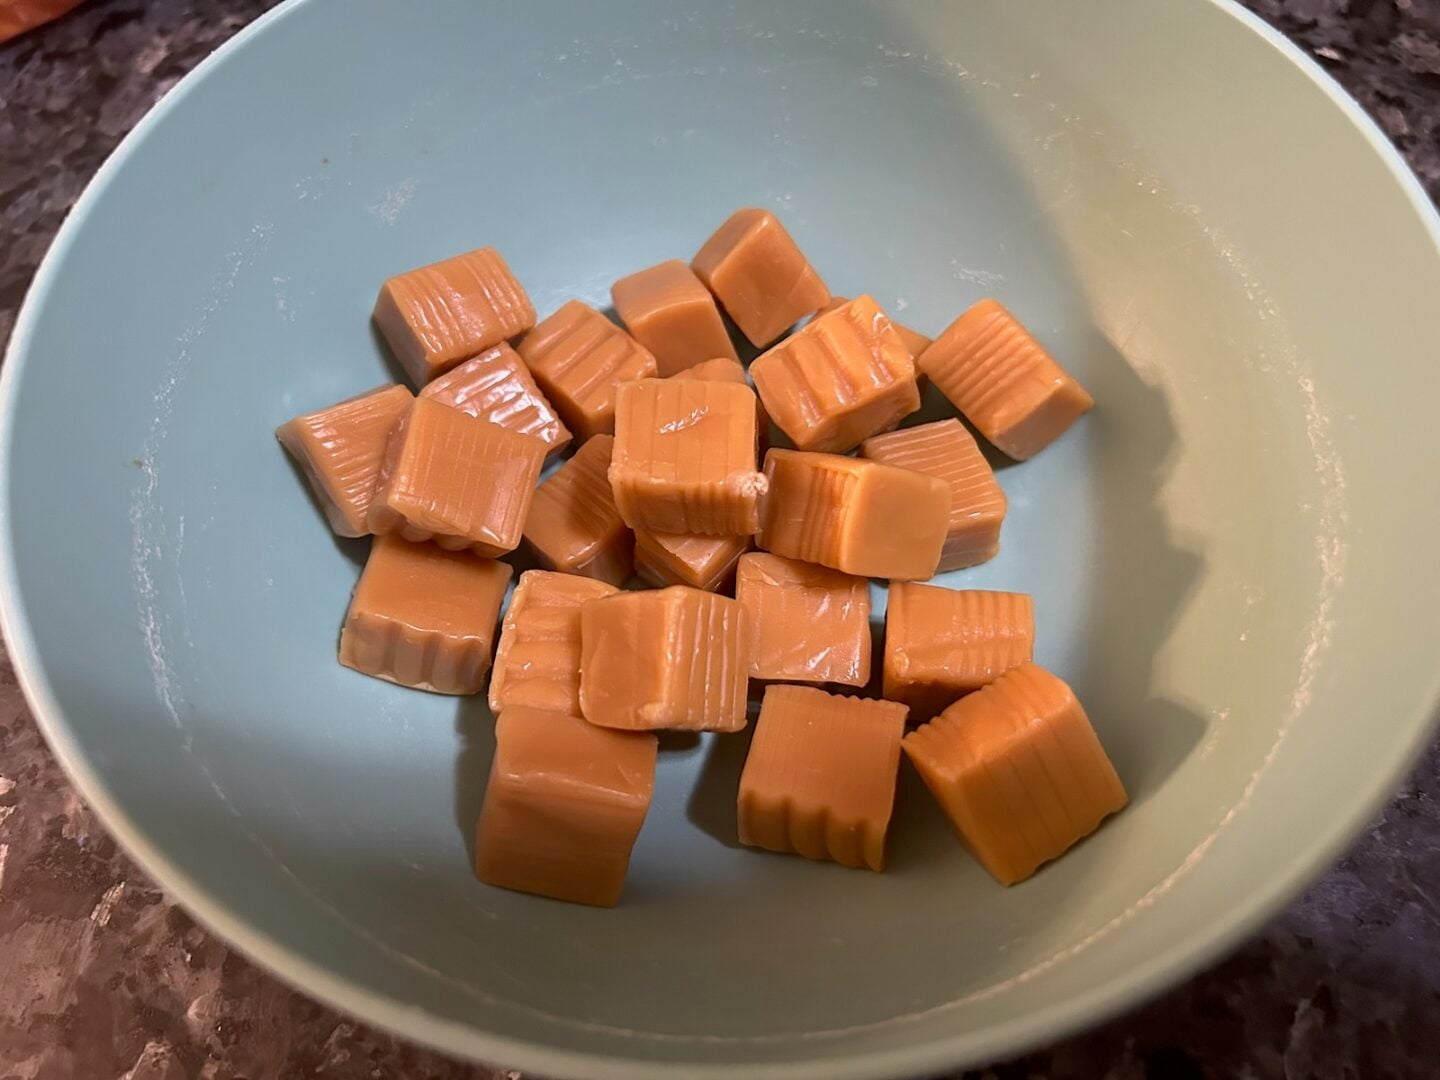
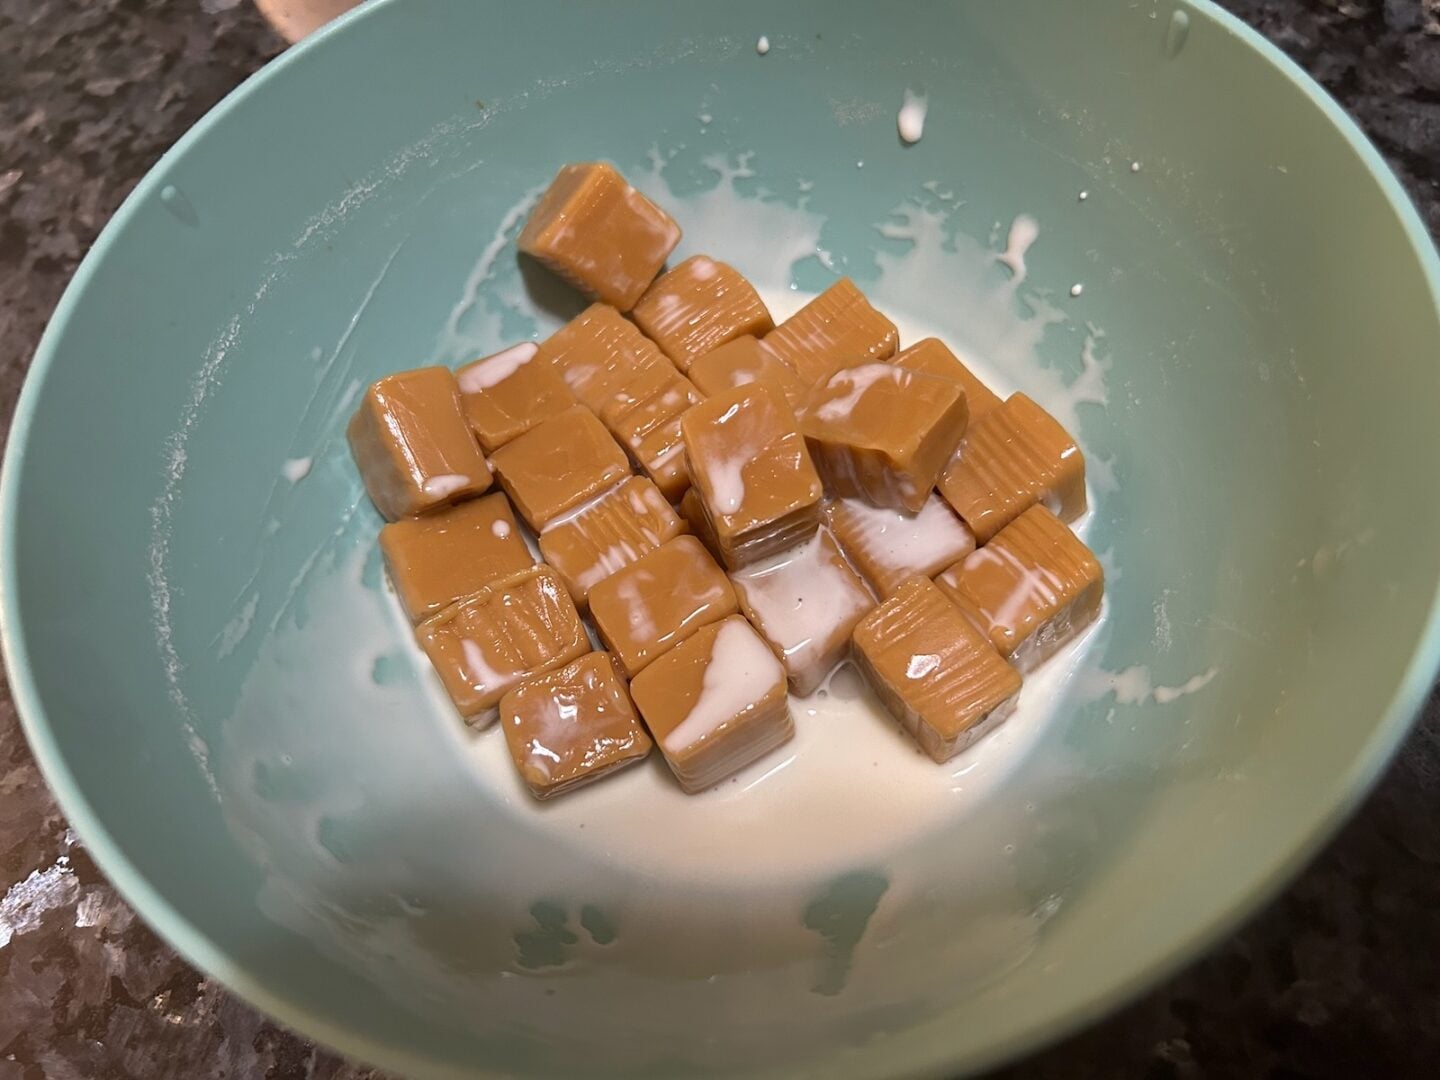
While the cookie cups are baking go ahead and prepare the caramel Unwrap 36 Kraft caramels and place them in a microwave-safe bowl. Add 3 tablespoons of heavy whipping cream.
Microwave in 20-second intervals, stirring well after each interval, until the caramels are completely melted and smooth.
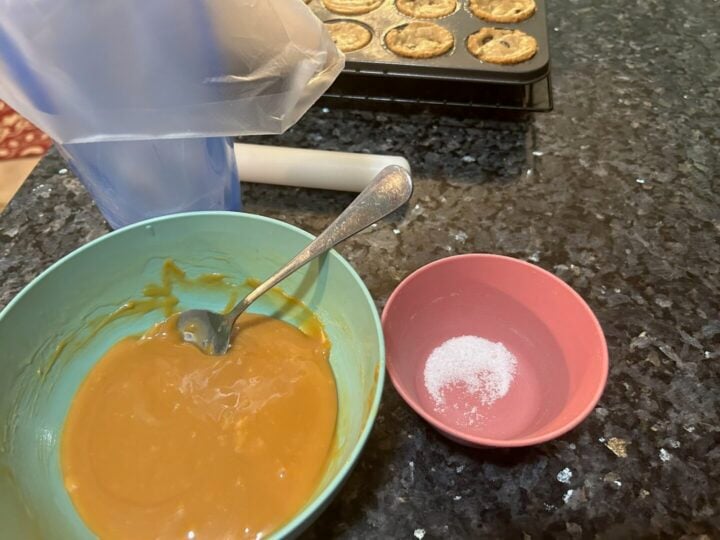
Be careful! The caramel and bowl will be very hot.
Transfer the melted caramel to a piping bag or heavy zip-top bag. Let it cool until the bag is warm but comfortable to handle. If it’s painfully hot, it’s also likely too thin to pipe neatly.
Form the Wells
Remove the pan from the oven and place it on a wire cooling rack.
Immediately use a tart shaper, the rounded end of a wooden spoon, or another small round tool to press a deep well into the center of each cookie.
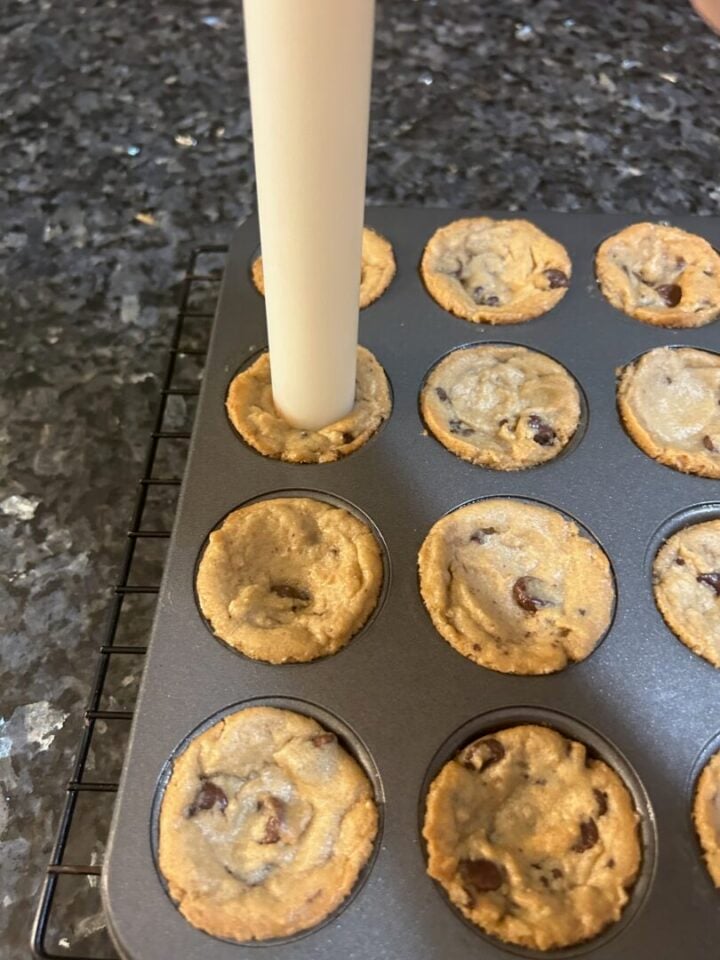
Be gentle. You want to create space for plenty of caramel without breaking through the bottom of the cookie cup.
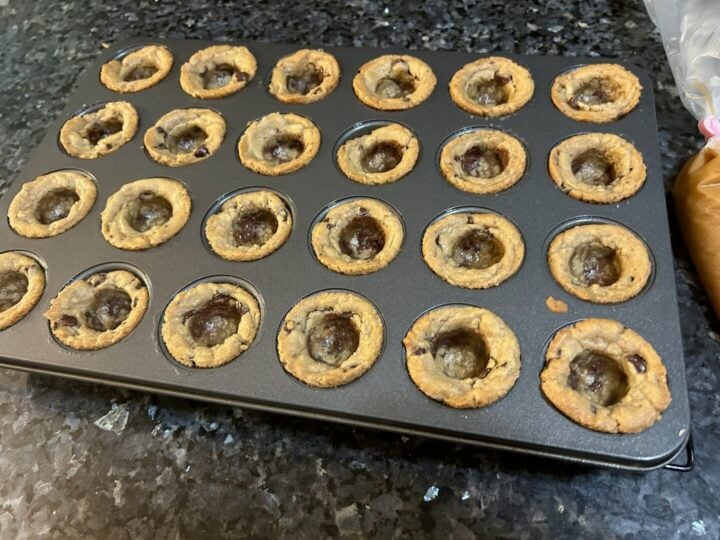
Allow the cookie cups to cool in the pan for about 8–10 minutes. They should remain warm but should be firm enough to hold their shape.
Fill the Cookie Cups
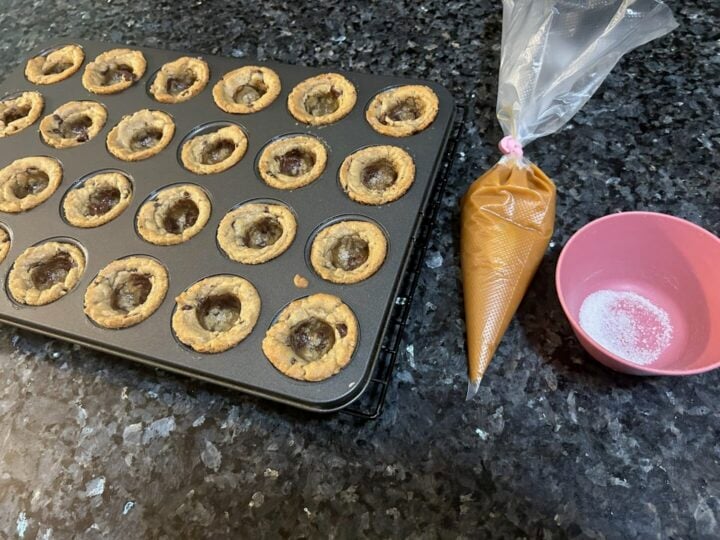
Leave the cookie cups in the mini muffin pan while you fill them. The pan will support the fragile cookie walls and help them hold their shape. Snip a small opening from the tip of the piping bag.
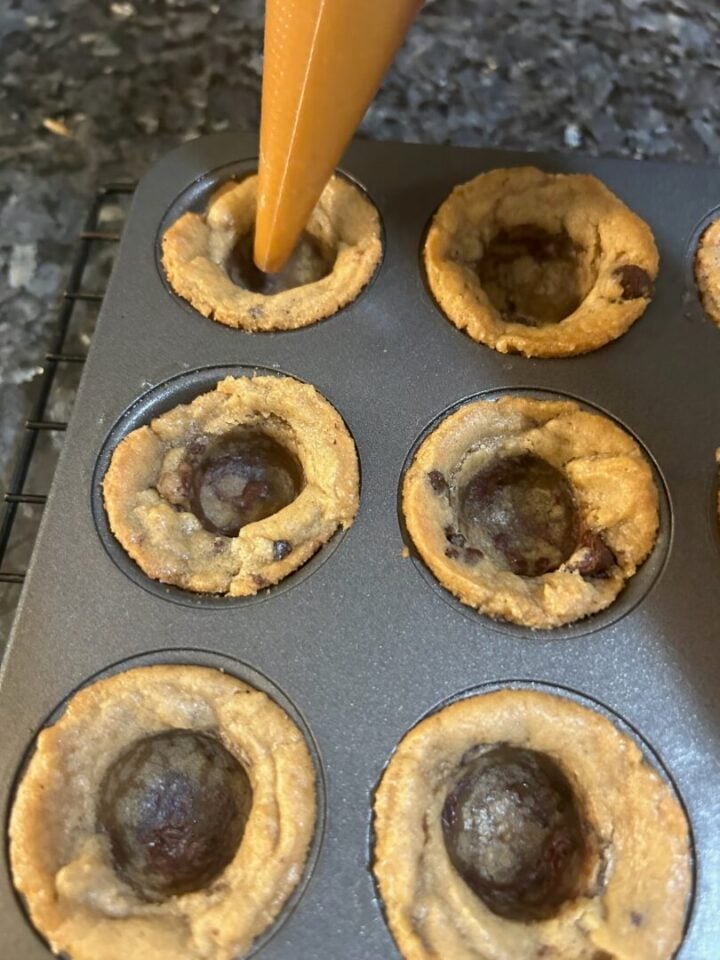
Divide most of the caramel among the 24 cookie cups. Make a modest first pass so every cup receives filling, then return and add more caramel where needed.
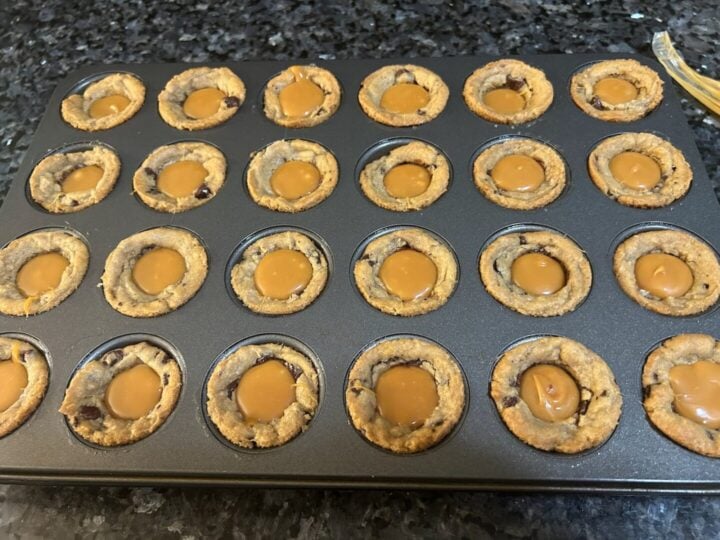
Reserve a small amount of caramel for drizzling.
Add the Caramel Drizzle and Sea Salt
Once the cookie cups are firm enough to remove, carefully loosen their edges with a thin knife and transfer them to a cooling rack.
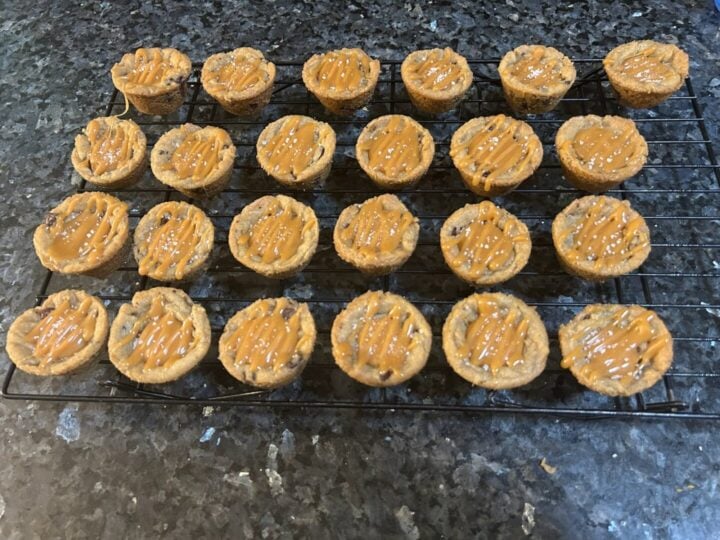
Drizzle the remaining caramel back and forth over the tops.
Immediately add the tiniest sprinkling of coarse sea salt. You only need a few grains on each cookie cup. Too much salt will overpower the caramel and chocolate.

Allow the caramel to set completely before serving or packaging.
What to Expect From These Cookie Cups

These are rich, chewy, gooey, and absolutely delicious!
The chocolate chip cookie forms a thick little shell with lightly crisp edges and a soft center. The warm caramel settles deep inside the cookie cup and remains soft and creamy, thanks to the addition of heavy cream.
A little extra caramel drizzled over the top reinforces the flavor, while the sea salt cuts through the sweetness and makes the caramel taste even richer.

When you cut one open, you’ll see a deep pocket of gooey caramel surrounded by chocolate chip cookie. It’s quite a bite!
Why You’ll Love These Cookie Cups
There’s so much to love about this simple dessert!
- They begin with convenient refrigerated cookie dough.
- No mixer or mixing bowl is required.
- They’re filled with soft, creamy caramel.
- Sea salt balances the sweetness.
- The caramel drizzle makes them look extra special.
- They’re easy to package and transport once set.
- They’re perfect for beginning bakers.
- You only need a few simple ingredients.
- They taste completely homemade!
A Note About the Caramel
I initially melted 24 Kraft caramels with about 2 tablespoons of heavy cream, but that wasn’t enough to generously fill and drizzle all 24 cookie cups.
I melted another 12 caramels with an additional tablespoon of cream.
The final tested amount was:
- 36 Kraft caramels
- 3 tablespoons heavy whipping cream
That was just right for filling all 24 cups and adding a decorative drizzle over the tops.
If you don’t want the drizzle, you may be able to reduce the amount slightly, but I recommend making the full quantity. These cookie cups are all about that glorious caramel center!
Can I Use Homemade Chocolate Chip Cookie Dough?
Absolutely!
I used refrigerated Toll House dough because I needed something truly easy after a long day in the kitchen. If you prefer to bake from scratch, use the cookie dough from my Chocolate Chip Cookie Cups with Nutella Filling.
Scoop the dough into approximately 18-gram balls and chill before baking. Frozen cookie dough balls will also work, but they may require an additional minute or two in the oven.
Tips for Success
- Lightly spray the mini muffin pan so the cookies release easily.
- Use approximately one tablespoon or 18 grams of dough per cavity.
- Don’t overbake the cookie cups.
- Press the wells while the cookies are still hot and pliable.
- Leave the cookies in the pan while adding the caramel filling.
- Let the caramel cool slightly before transferring or handling the piping bag.
- Fill all 24 cups modestly before adding more to any one cup.
- Reserve a little caramel for drizzling.
- Use only a few grains of sea salt on each cookie.
- Let the caramel set completely before packaging or stacking.
Variations
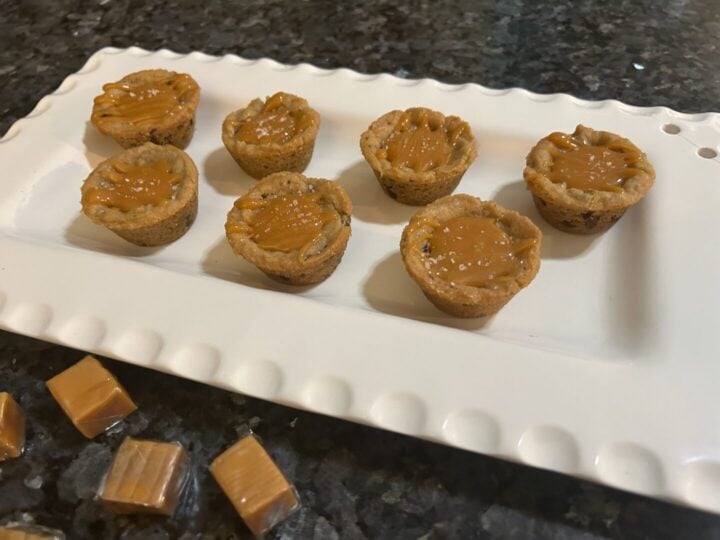
These cookie cups are delicious as written, but you can easily change them up.
Plain Caramel Cookie Cups
Leave off the sea salt for a simple caramel chocolate chip cookie cup.
Dark Chocolate Caramel Cookie Cups
Start with chocolate cookie dough or add a small drizzle of dark chocolate after filling.
Caramel Pretzel Cookie Cups
Top each cookie cup with a small pretzel piece for a salty crunch.
Caramel Apple Cookie Cups
Add a tiny spoonful of thick apple pie filling underneath the caramel. Make sure the apple pieces are finely chopped.
Holiday Caramel Cookie Cups
Add festive sprinkles immediately after drizzling the caramel. Use a very light hand so the caramel remains the star.
Homemade Caramel Cookie Cups
Replace the melted candies with your favorite thick homemade caramel sauce. Make sure the sauce is firm enough to remain inside the cookie cups at room temperature.
Storage
Allow the caramel to set fully before storing the cookie cups.
Place them in a single layer in an airtight container and store at cool room temperature for up to three days.
If you must stack them, place parchment or waxed paper between the layers. Keep in mind that the caramel drizzle may remain slightly sticky.
You can refrigerate the cookie cups if your kitchen is especially warm, but refrigeration will make the caramel and cookies firmer. Bring them back to room temperature before serving for the best soft, chewy texture.
Can I Freeze Salted Caramel Cookie Cups?
The unfilled chocolate chip cookie cups freeze beautifully.
Place them in an airtight freezer-safe container and freeze for up to two months. Thaw completely before filling with caramel.
You can also freeze the portioned chocolate chip cookie dough and bake the cups later.
Because caramel can change texture after freezing and thawing, I prefer freezing the cookie cups before adding the filling.
Perfect for Care Packages
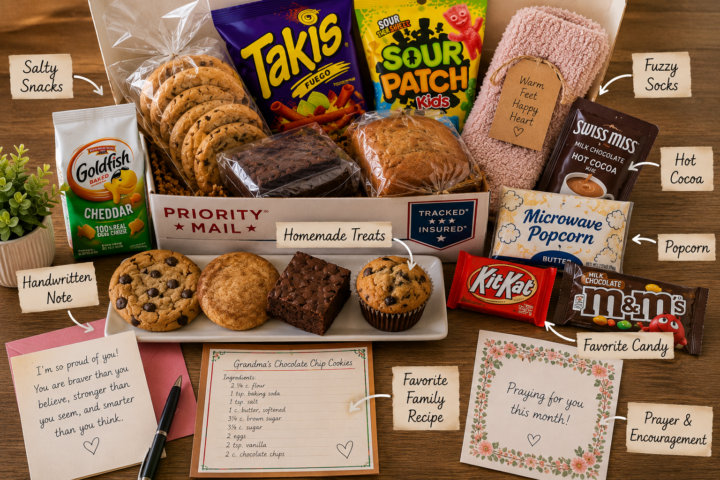
Once the caramel is completely set, these make a lovely addition to a personally delivered care package.
Place each cookie cup in a paper or foil mini cupcake liner, then arrange the cups in a single layer inside a covered container.
Because caramel can become very soft in high temperatures, avoid leaving the container inside a hot vehicle. If you’re shipping the cookie cups during warm weather, consider choosing a cooler-weather shipping day or adding appropriate temperature protection.
Frequently Asked Questions

Can I use caramel sauce instead of Kraft caramels?
You can, but it needs to be a thick caramel sauce. Thin ice cream topping may soak into the cookies, run over the sides, or remain too messy for packaging.
Why do I add heavy cream to the caramels?
Heavy cream helps the candies melt smoothly and keeps the caramel softer after it cools.
How much caramel do I need for 24 cookie cups?
I used 36 Kraft caramels and 3 tablespoons of heavy cream. This was enough to fill all 24 cookie cups and drizzle caramel over the tops.
Can I use milk instead of heavy cream?
Yes, but the finished caramel may be slightly thinner. Begin with a smaller amount and add more only as needed.
How do I keep the caramel from becoming too runny?
Allow it to cool for a few minutes after melting. It should be warm and fluid but thick enough to pipe in a controlled ribbon.
Why did my caramel become too thick to pipe?
The caramel cools and thickens quickly. If necessary, return it to the microwave for a few seconds, then stir or gently knead the piping bag before continuing.
Should I fill the cookie cups while they’re still in the pan?
Yes. I recommend filling them in the mini muffin pan because the cavities support the cookie walls while the cookies are still warm and fragile.
How much sea salt should I use?
Very little! A few visible grains per cookie cup are plenty. You want the salt to balance the sweetness without overwhelming the caramel.
Do these cookie cups need to be refrigerated?
Not necessarily. Store them in an airtight container at cool room temperature for up to three days. Refrigerate them if your kitchen is particularly warm, then bring them to room temperature before serving.
Can I make these the night before?
Yes. In fact, making them the night before gives the caramel plenty of time to set before serving or packaging.
Can I use homemade cookie dough?
Absolutely. Use a sturdy chocolate chip cookie dough, portion it into approximately 18-gram balls, and chill before baking.
Why are my cookie cups breaking?
They may still be too warm. Allow them to cool and firm in the pan before loosening the edges with a thin knife.
More Cookie Cups to Try
If you enjoy these little desserts, check out some of my other favorites:
Final Thoughts
This recipe wasn’t part of my original plan.
I had purchased a large tub of chocolate chip cookie dough to make viral Reese’s cookie cups for my granddaughters’ college care packages. When I realized I still had half the tub remaining, I started looking through my pantry for another simple filling.
A couple of packages of Kraft caramels provided the answer.
These Salted Caramel Chocolate Chip Cookie Cups came together quickly, required very little cleanup, and gave me a second completely different treat for the girls.
Tomorrow morning, I’ll meet my granddaughters for brunch and send them off with packages filled with a little piece of home.
And really, that’s what this whole evening was about.
Thanks for Stopping By!
If you make these delicious Salted Caramel Chocolate Chip Cookie Cups and love them please leave a comment or review. And before you go, please pin some photos to your Pinterest boards.

Janice Thompson is a professional baker, cake designer, and author with over 20 years of experience creating unique cakes and desserts. She’s the creator of Out of the Box Baking, where she shares her favorite doctored cake mix recipes, tutorials, and baking tips. Learn more →

Salted Caramel Chocolate Chip Cookie Cups
Soft, chewy cookie cups filled with rich caramel and finished with a sprinkle of sea salt. These easy salted caramel cookie cups are the perfect bite-sized treat for parties, bake sales, holidays, or anytime you're craving something sweet and salty.
Ingredients
- ½ of a 36-ounce tub refrigerated chocolate chip cookie dough, about 18 ounces
- 36 Kraft caramels, unwrapped
- 3 tablespoons heavy whipping cream
- Coarse sea salt, for a very light sprinkling
- Nonstick baking spray
Instructions
1. Preheat the oven to 350°F.
2. Lightly spray a 24-cavity mini muffin pan with nonstick baking spray.
3. Portion approximately 1 tablespoon or 18 grams of chocolate chip cookie dough into each muffin cavity.
4. Bake for 11–13 minutes, until the edges are set and lightly golden. The centers should remain soft but shouldn’t appear wet or raw.
5. Immediately press a deep well into the center of each warm cookie using a tart shaper or the rounded end of a wooden spoon.
6. Allow the cookie cups to cool in the pan for 8–10 minutes.
7. Place the unwrapped caramels and heavy cream in a microwave-safe bowl.
8. Microwave in 20-second intervals, stirring after each interval, until melted and completely smooth.
9. Transfer the caramel to a piping bag or heavy zip-top bag. Allow it to cool until the bag is warm but comfortable to handle.
10. Leave the cookie cups in the pan and pipe caramel into each well. Reserve a small amount for drizzling.
11. Allow the filled cookie cups to cool and firm before carefully loosening the edges and transferring them to a wire rack.
12. Drizzle the remaining caramel over the cookie cups.
13. Immediately add a very light sprinkling of coarse sea salt.
14. Allow the caramel to set completely before serving or packaging.
Notes
* My partially chilled cookie dough baked in approximately 12 minutes.
* Fill the cookie cups while they remain in the mini muffin pan. The pan supports the cookie walls while they’re still fragile.
* Make a modest first pass with the caramel so every cookie cup receives filling, then add more where needed.
* Use only a few grains of sea salt per cup.
* Store in a single layer in an airtight container at cool room temperature for up to three days.
* Homemade chocolate chip cookie dough can be substituted. Use approximately 18 grams per cookie cup.